Why an LED Lighting Retrofit Is One of the Smartest Upgrades You Can Make in 2026
An LED lighting retrofit is one of the fastest ways to cut energy costs, reduce maintenance headaches, and improve the quality of light in your home or business — without tearing out your existing fixtures.
Here’s what you need to know at a glance:
| Question | Quick Answer |
|---|---|
| What is it? | Replacing old bulbs and components with LED inside your existing fixture housing |
| How much can you save? | Up to 60% on lighting energy costs |
| How long do LEDs last? | 50,000 to 100,000 hours (5–11 years) |
| Can you DIY it? | Simple recessed cans: yes. Commercial or ballast-bypass work: hire a licensed electrician |
| Is there financial help? | Yes — utility rebates (like ComEd) can significantly cut upfront costs |
| Payback period? | Typically a few years, often faster with rebates |
Whether you’re a homeowner in the Chicago suburbs dealing with outdated recessed cans, or a business owner looking to slash a commercial utility bill, retrofitting to LED is almost always worth it. You get better light, lower bills, and far less time swapping bulbs — all without the cost and mess of a full fixture replacement.
I’m Michał Napieralski, founder of Energy Co. and a licensed electrician with years of hands-on experience helping Chicagoland homeowners and businesses complete LED lighting retrofit projects safely and cost-effectively. In this guide, I’ll walk you through everything — from picking the right hardware to knowing when to call a pro.
Simple guide to led lighting retrofit:
What is an LED Lighting Retrofit?
To understand a led lighting retrofit, it helps to think of it as upgrading the engine of a classic car while keeping the beautiful vintage body intact. Instead of tearing out your entire light fixture, ceiling drywall, and wiring, we simply swap the old, inefficient lighting technology (like incandescent, halogen, metal halide, or fluorescent) with a modern LED system designed to fit right inside the existing housing.
Many people assume that transitioning to LED requires a complete demolition of their current ceiling setup. Fortunately, retrofitting completely avoids this labor-intensive and costly remodeling process. This is a massive win for owners of older Chicagoland homes with plaster ceilings, where cutting into the plaster can easily lead to crumbling, messy repairs, and unexpected structural issues.
By utilizing the existing infrastructure, retrofitting also dramatically reduces physical waste. Instead of throwing entire metal troffers or recessed cans into a Cook County landfill, you only dispose of the old bulbs, trims, and ballasts.
To help you decide which path is right for your property, let’s compare retrofitting against a full fixture replacement:
| Feature | LED Retrofit Kit | Full Fixture Replacement |
|---|---|---|
| Upfront Cost | Lower (uses existing housings) | Higher (requires complete new fixtures) |
| Labor Time | Fast (often minutes per fixture) | Lengthy (requires ceiling access and rewiring) |
| Ceiling Impact | None (preserves existing drywall/plaster) | High (often requires patching and painting) |
| Disposal Waste | Minimal (bulbs, trims, and ballasts only) | High (entire bulky metal fixtures) |
| Aesthetic Control | Excellent (modern trim covers old cans completely) | Maximum (can change fixture style entirely) |
If you want to dive deeper into how this applies to home ceilings, check out our comprehensive recessed lighting LED retrofit guide for a clear, step-by-step breakdown.
The Financial and Environmental Benefits of Upgrading
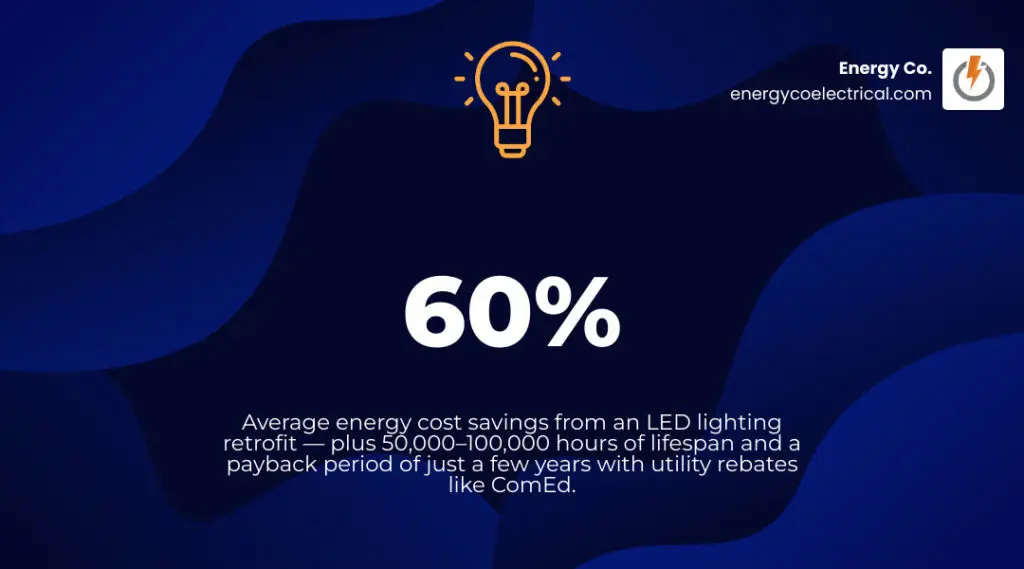
The decision to execute an led lighting retrofit is rarely just about aesthetics—it is a highly strategic investment. Traditional lighting systems are notorious energy hogs. When you upgrade to LED, you can expect an immediate reduction in lighting energy consumption of up to 60% compared to traditional fluorescent systems, and even more when replacing halogen or incandescent bulbs.
Furthermore, traditional bulbs require frequent replacement. Standard incandescent bulbs burn out after a mere 1,000 to 2,000 hours, while fluorescents max out around 10,000 to 15,000 hours. In contrast, quality LED retrofits boast an average lifespan of 50,000 to 100,000 hours. If you run your lights for 12 hours a day, a 100,000-hour rated LED system can last over 22 years before requiring replacement! This drastically cuts ongoing maintenance costs, saving you from constantly climbing ladders or hiring maintenance crews to swap out hard-to-reach bulbs.
On the environmental side, the drop in energy use directly translates to a smaller carbon footprint. For example, in a real-world campus retrofit, upgrading gymnasium and parking lot lights cut greenhouse gas emissions by 53,318 pounds annually.
If you’re operating a business in Cook County, transitioning to LEDs is one of the most effective ways to lower overhead. You can learn more about local commercial advantages in our guide to Chicago commercial lighting upgrades.
Calculating Your ROI on an LED Lighting Retrofit
Calculating the Return on Investment (ROI) and payback period of your retrofit project is straightforward. To determine your annual savings, we look at three main factors:
- Energy Savings: Multiply the wattage reduced by your local utility rate (e.g., ComEd rates in the Northwest Suburbs) and your annual operating hours.
- Maintenance Savings: Add the cost of replacement bulbs and the estimated labor hours saved by not having to replace them.
- Rebates: Subtract any upfront utility incentives from your initial project costs.
In many commercial applications, trading in old fluorescents for efficient LEDs drastically cuts costs—often by as much as 50%—and typically provides payback with savings and rebates in just a few years. For example, a real-world retrofit at a school campus achieved an incredible 71% reduction in lighting energy use, saving 41,571 kWh annually. With a utility rebate of $5,261 offsetting the initial hardware costs, the school saw an immediate return on investment and saved thousands of dollars in annual maintenance and power bills.
Choosing the Right Hardware for Your Space
Selecting the right hardware is essential to ensure your retrofit looks great and functions perfectly. You must evaluate several technical specifications before making a purchase:
- Size and Fit: Measure the physical dimensions of your existing fixtures. For recessed cans, this means verifying if you have 4-inch, 5-inch, or 6-inch housings. For linear troffers, common sizes include 1×4, 2×2, 2×4, or 2×8 feet.
- Wattage and Lumens: Do not focus solely on wattage. Look at the lumen output (the actual brightness). Modern LEDs deliver far more lumens per watt (efficacy). For instance, a high-quality kit can deliver an efficacy of 140 to 160 lumens per watt (lm/W), allowing you to replace a high-wattage legacy bulb with a fraction of the energy draw.
- Color Temperature (CCT): Measured in Kelvin (K), this determines how warm or cool the light looks. Many modern kits offer a 5CCT selectable switch, allowing you to toggle between 2700K (Soft White), 3000K (Warm White), 3500K (Neutral White), 4000K (Cool White), and 5000K (Daylight) during installation to find the perfect ambiance.
- Color Rendering Index (CRI): Look for a CRI rating of 90+ for residential and retail spaces. This ensures that colors appear vibrant, accurate, and true-to-life.
- Dimming Compatibility: Ensure your retrofit kit is compatible with modern dimming protocols. For residential spaces, look for TRIAC dimming. For commercial spaces, 0-10V dimming is the industry standard for seamless integration with building control networks.
- Thermal Management: High-performance LEDs generate heat at the chip level. Opt for retrofit kits featuring solid cast aluminum heat sinks rather than cheap plastic trims. Aluminum pulls heat away from the LED chips, preventing premature burnout and protecting your investment.
Selecting the Best LED Lighting Retrofit Kits by Application
Different spaces require specialized retrofit solutions. Here is a breakdown of the most common applications:
- Recessed Can Lights: Perfect for residential kitchens, living rooms, and offices. Modern kits feature integrated metal trims and spring clips that slide directly into existing housings using simple E26 medium screw base adapters. If you want to find the top-performing models on the market today, check out our guide on best LED retrofit kits for recessed lighting.
- Troffers and Panels: Commonly found in offices, schools, and hospitals. You can utilize high-performance kits like the TAR3 Series Selectable Architectural LED Troffer Retrofit Kit – NICOR Lighting or the 2×8 Claris Gen 3 LED Troffer Retrofit Kit – 64W – LED Living to upgrade 2×2, 2×4, or 2×8 fluorescent systems in minutes without disturbing the ceiling grid. For a complete catalog of commercial options, you can review the Metalux LED Retrofit Kit brochure .
- Strip Lights: Ideal for utility rooms, corridors, and retail displays. Solutions like the Ace LED Strip Conversion Kit (ASCK2) | Linmore or the RS2 Series Retrofit Strip Kits – Controls Ready allow you to convert linear fluorescent strip fixtures into high-efficiency LED runs, often utilizing magnetic-backed components for ultra-fast, tool-free installation.
- High Bay and Area Fixtures: For warehouses, gymnasiums, and parking lots. High-output systems, such as the 240W LED Retrofit Kit, produce up to 33,600 lumens to replace massive 400W to 750W metal halide lamps, delivering brilliant light while withstanding extreme operating temperatures.
Step-by-Step Guide to Installing an LED Retrofit
While simple recessed downlight retrofits can be a satisfying DIY project for handy homeowners, commercial retrofits, high-voltage systems, and installations requiring a ballast bypass should always be handled by a licensed professional to ensure safety and electrical code compliance.
Here is what a typical step-by-step ballast-bypass installation process looks like for a commercial linear fixture:
- Safety First: Always turn off the circuit breaker to cut all power to the lighting fixture before beginning. Verify the power is off using a reliable voltage tester.
- Remove Old Components: Open the fixture lens, remove the old fluorescent tubes, and take off the wiring channel cover.
- Bypass the Ballast: Locate the ballast. Disconnect the input hot and neutral wires from the ballast, and cut the wires leading from the ballast to the sockets (tombstones). You can either remove the ballast completely or leave it disconnected inside the housing to avoid disposal fees.
- Wire Directly to the Sockets: Connect the incoming line voltage (hot and neutral) directly to the sockets (for Type B double-ended lamps) or directly to the new LED driver included in your magnetic strip kit.
- Mount the LED Retrofit: If using a magnetic-mount kit, simply snap the magnetic LED strips and magnetic driver directly onto the steel interior of the existing fixture housing. Adjust the placement to ensure uniform light distribution.
- Connect and Secure: Plug the quick-connect wiring harnesses from the driver into the LED strips. Secure any loose wires with zip ties.
- Test and Restore Power: Reinstall the fixture cover or lens, restore power at the circuit breaker, and enjoy your bright, flicker-free, energy-efficient light!
For commercial spaces where safety, local codes, and minimizing business downtime are critical, we highly recommend utilizing professional commercial electrical services to ensure the job is done perfectly.
Frequently Asked Questions about LED Retrofits
What certifications should I look for in a quality retrofit kit?
When buying retrofit hardware, look for reputable safety and performance certifications. The DesignLights Consortium (DLC) and DLC Premium listings are the gold standard for commercial products, indicating high efficacy and performance (and are almost always required to qualify for local utility rebates). For residential products, look for the Energy Star label and JA8 compliance (which guarantees high color quality and dimming performance). Always ensure the product features an ETL or UL listing, verifying that the hardware has undergone rigorous safety testing.
Do I need to bypass the existing ballast during installation?
Yes, for the vast majority of high-quality commercial and linear retrofits, bypassing the ballast (installing a Type B direct-wire system) is highly recommended. Ballasts regulate electricity for old fluorescent tubes, but they consume extra energy (leading to energy loss) and represent a common failure point. By bypassing the ballast, you wire the line voltage directly to the LED driver or sockets, permanently eliminating ballast maintenance costs and maximizing your energy savings.
What are the hidden benefits of upgrading to LED?
While energy savings get all the headlines, there are massive “hidden” benefits to an LED upgrade:
- Workplace Safety: LEDs are brighter and cover more ground, reducing the risk of heavy machinery and forklift accidents in warehouses and industrial facilities.
- Employee Productivity and Morale: A survey of commercial and industrial facilities found that 74% of respondents reported happier employees as a result of lighting improvements, thanks to reduced eye strain and glare.
- Retail Sales Boost: High-quality interior lighting has been shown to give retailers an average 1.93% sales boost by making merchandise look more attractive and inviting.
- Smart Integration: Modern retrofits are often “controls ready,” allowing you to easily snap in occupancy sensors, daylight harvesting nodes, or wireless smart systems to automate your savings. Explore the possibilities in our guide on Chicago Smart Lighting: The Future is Energy Efficient.
Conclusion
Upgrading your property with an led lighting retrofit is a smart, cost-effective, and environmentally friendly decision. By preserving your existing fixtures, you save on upfront labor costs, protect older plaster ceilings, and avoid unnecessary waste—all while enjoying lower electric bills, better light quality, and zero bulb-changing hassles for years to come.
At Energy Co., we take pride in being a top-rated lighting contractor in Cook County and the Northwest Suburbs. Whether you need a residential upgrade in Arlington Heights or a massive commercial warehouse retrofit in Schaumburg, our licensed professionals bring local expertise and a 100% satisfaction guarantee to every project.
Ready to upgrade your space? Explore our professional commercial lighting services and retrofits and contact us today to schedule your consultation!