Why Electrical Troubleshooting Is a Skill Every Homeowner Needs
Electrical troubleshooting is the process of systematically finding and fixing faults in your home’s electrical system — from a tripped breaker to a dead outlet to flickering lights.
Here’s a quick overview of the most common issues and what to do first:
| Problem | First Step | Call a Pro If… |
|---|---|---|
| Tripped breaker | Reset at the panel | It trips immediately again |
| Dead outlet | Press RESET on nearby GFCI | No GFCI found, still no power |
| Flickering lights | Check bulb and tighten fixture | Affects multiple rooms |
| Warm or sparking outlet | Stop using it immediately | Always — this is an emergency |
| Burning smell | Turn off the circuit | Always — this is an emergency |
Electrical problems are more common than most people think. According to the National Fire Protection Association, residential electrical issues affect around 51,000 homes every year in the United States — causing an estimated $1.3 billion in property damage annually.
The good news? Many everyday problems have simple causes. A dead bathroom outlet is often just a tripped GFCI. A frequently tripping breaker may simply be an overloaded circuit. Knowing where to look — and when to stop and call a professional — can save you time, money, and real danger.
This guide walks you through everything: safety protocols, fault types, step-by-step fixes, and the warning signs that mean you need a licensed electrician immediately.
I’m Michał Napieralski, a licensed electrician with years of hands-on experience in residential and commercial electrical troubleshooting across the Chicago suburbs, specializing in panel upgrades, wiring repair, and code-compliant electrical services. Let’s start with the fundamentals — so you can approach any electrical problem with confidence.
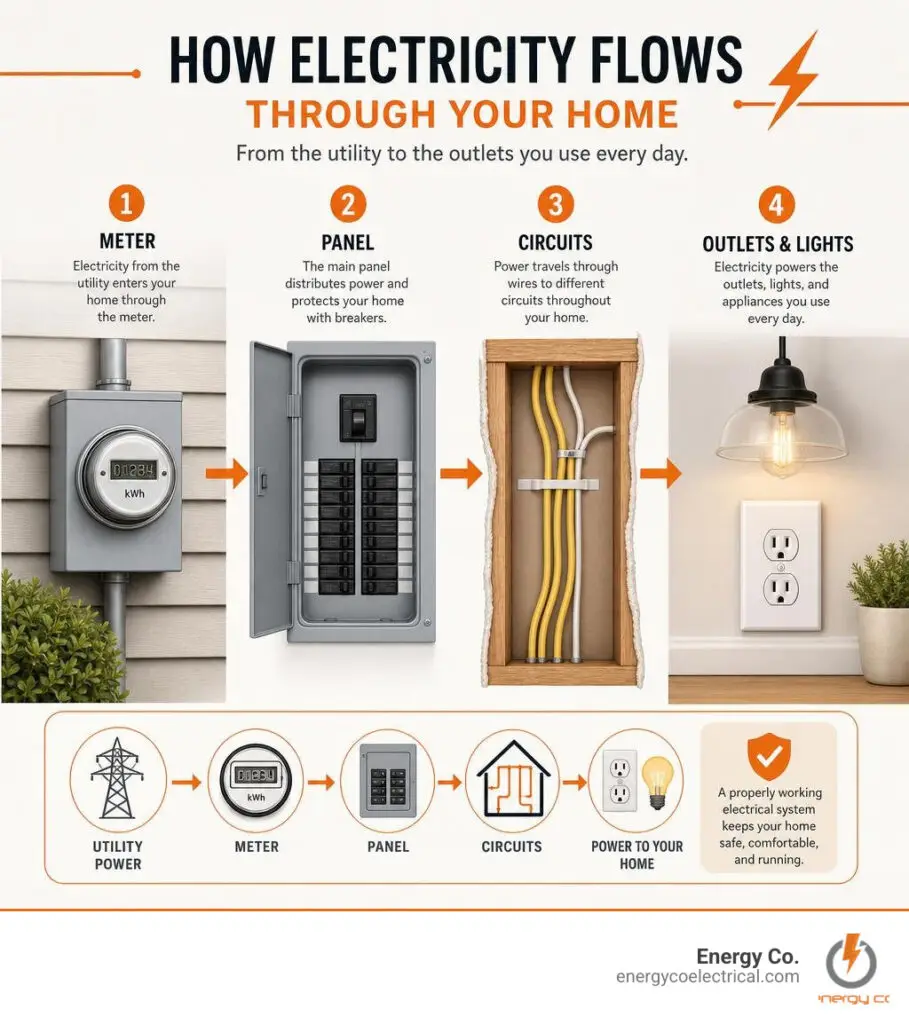
Core Safety Protocols and Essential Tools for Electrical Troubleshooting
Before we even think about touching a wire, we must establish a golden rule: safety is not optional. When dealing with residential electrical systems, a single mistake can lead to severe shocks, arc flashes, or electrical fires.
At Energy Co., we always emphasize that the goal of electrical troubleshooting is to replace assumptions with measurements—but we must do so without becoming part of the circuit. Before you attempt any DIY diagnostic steps, you must understand the core safety protocols.
First, always de-energize the circuit you are working on. Never rely on a wall switch to cut the power; always switch off the corresponding circuit breaker at the main service panel. If you are working inside the panel itself or on major appliances, follow basic lockout-tagout (LOTO) principles. This means labeling the breaker panel with a warning tag or locking the panel door so no one else in your home accidentally flips the breaker back on while you are working.
Second, understand your physical boundaries. Wear dry, rubber-soled shoes, and never work near water or with wet hands. Use insulated hand tools rated for at least 1,000 volts. Finally, always perform a two-step verification check to confirm the absence of voltage before touching any conductors. We discuss how to do this safely in our guide on Electrical Repairs Dos and Don’ts for Beginners.
For a complete foundation on safe diagnostic practices, you can also review the industry-standard safety guidelines outlined in the Electrical Troubleshooting Basics – Electrical Units resource.
Essential Tools for Safe Electrical Troubleshooting
To diagnose electrical faults efficiently, you do not need a truck full of commercial gear, but you do need a few high-quality, reliable instruments. Here are the essential tools we recommend keeping in your home diagnostic toolkit:
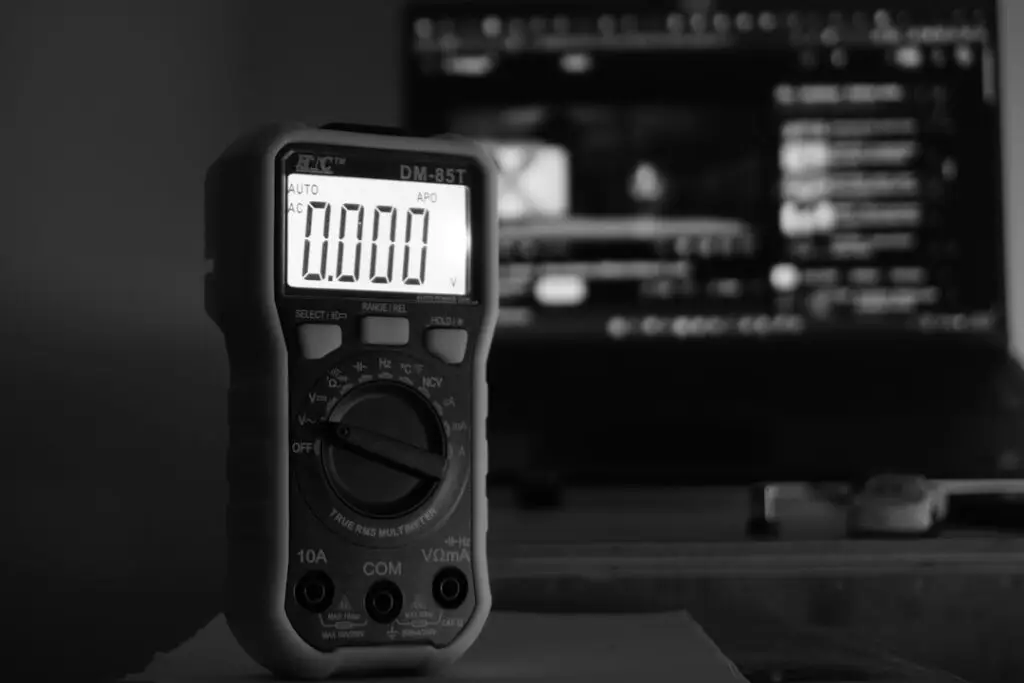
- Digital Multimeter (DMM): The single most important tool for electrical diagnostics. A quality multimeter allows you to measure AC/DC voltage, continuity, and resistance. When testing household outlets, you will primarily use the AC voltage setting (600V range) and the continuity setting to check if a wire has a clean, unbroken path.
- Non-Contact Voltage Tester (NCVT): Often called a “voltage pen,” this tool detects the electrical field surrounding live AC wiring without requiring direct contact with bare copper. It is your first line of defense for a quick safety check, though it should always be verified with a multimeter for absolute certainty.
- Thermal Camera (Infrared Imager): An incredibly useful modern tool. A compact thermal camera allows you to scan your electrical panel, outlets, and wall switches to look for hidden “hot spots.” High resistance caused by loose wire terminations or overloaded circuits naturally generates heat, which shows up clearly on a thermal scan before a fire can start.
- Clamp Meter: This tool allows you to measure electrical current (amperage) flowing through a wire without disconnecting it. You simply clamp the jaw around a single hot conductor to see exactly how many amps a circuit is drawing.
- Personal Protective Equipment (PPE): Safety glasses and insulated gloves rated for 1,000 volts are essential whenever you are working near open electrical boxes or testing live components.
Understanding Electrical Faults: Opens, Shorts, and Ground Faults
To troubleshoot like a professional, you must understand what is actually happening inside your walls when a failure occurs. Electrical currents travel in a continuous loop from the power source, through a hot wire to the load (like a lightbulb or appliance), and back to the source via the neutral wire. When this loop is disrupted, we experience a fault.
The table below outlines the four primary types of electrical faults you will encounter during home diagnostics:
| Fault Type | Description | Common Cause | Typical Symptom |
|---|---|---|---|
| Open Circuit | An incomplete path that completely stops the flow of current. | Broken wire, loose wire nut, or failed terminal screw. | Outlets or lights completely lose power; 0V reading. |
| Short Circuit | Current bypasses the load via an unintended low-resistance path. | Hot wire touching a neutral wire or metal box. | Breaker trips instantly with a loud “pop” or spark. |
| Ground Fault | An energized conductor contacts a grounded surface or the ground wire. | Damaged wire insulation or moisture in outdoor boxes. | GFCI outlet trips instantly; shock hazard if ungrounded. |
| Overamping | The circuit is drawing more current than its rated capacity. | Too many high-wattage appliances running at once. | Breaker trips after several minutes of operation; warm wires. |
To dive deeper into the theoretical physics of how energy moves through these circuits and how potential distribution changes during a fault, you can study the academic modules provided by the Modular Electronics Learning (ModEL) project.
In a healthy system, an open circuit simply means no current can flow because the pathway is broken. This is why a loose wire behind a receptacle can cause that outlet—and every outlet downstream from it—to die completely.
A short circuit, on the other hand, is highly dangerous because electricity always seeks the path of least resistance. When a hot wire touches a neutral wire directly, resistance drops to near zero, causing current to spike to thousands of amperes instantly. This massive surge is what triggers your circuit breaker’s magnetic trip mechanism to shut off power in milliseconds.
A ground fault is a specific type of short circuit where the current escapes to the ground path (such as a metal appliance frame or a bare copper ground wire). Under UL 943 standards, modern Ground Fault Circuit Interrupters (GFCIs) are designed to detect as little as 5 milliamperes of current leakage and shut off power immediately to prevent lethal shocks.
A Systematic Guide to Common Residential Electrical Problems
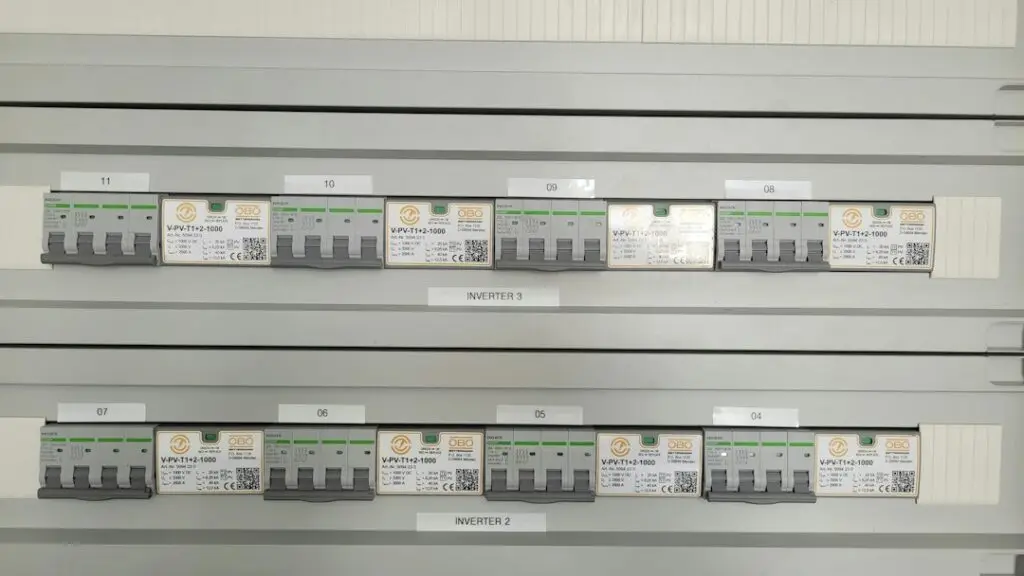
When electrical anomalies happen, it is easy to feel overwhelmed by the “spaghetti” of wires behind your walls. However, if you adopt a systematic approach, you can narrow down the root cause of most household issues in a matter of minutes.
If you find yourself facing sudden outages after dark, check out our guide on What to Do When Your Power Goes Bump in the Night for immediate, practical steps to restore safety.
Step-by-Step Electrical Troubleshooting for Tripped Breakers and Dead Outlets
When an outlet stops working, or a breaker trips, do not just blindly flip switches. Follow this structured diagnostic process:
- Identify the Scope: Is the entire room dark, or is it just a single receptacle? If multiple rooms are dead, the issue is likely at the main panel. If it is only one outlet, the problem is localized.
- Check and Reset GFCIs: GFCIs are often wired in series to protect standard downstream outlets. A tripped GFCI in your garage or bathroom can kill power to standard outlets in your outdoor patio or hallway. Locate all GFCI outlets in the area, press the “TEST” button, and then firmly press the “RESET” button.
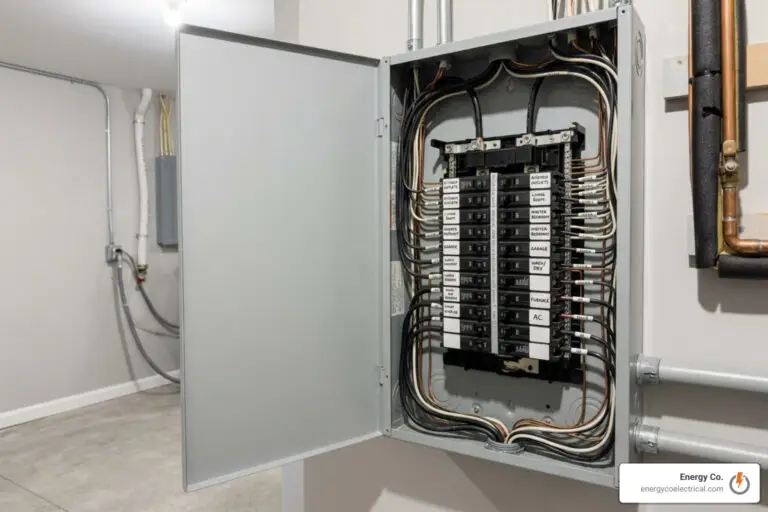
- Inspect the Breaker Panel: Go to your main service panel. A tripped breaker will not always be flipped completely to the “OFF” position; it usually hovers in the middle. To reset it properly, flip it firmly to the OFF position first until you hear a click, and then flip it back to ON.
- Isolate the Load: If the breaker trips again immediately, unplug every single device on that circuit. If the breaker now stays on, one of your appliances has an internal short circuit. If it trips even with nothing plugged in, you have a hard fault in the house wiring.
- Test for Voltage: Use a digital multimeter to test the dead outlet. Insert the probes into the hot and neutral slots. A healthy reading should be between 114V and 126V AC. If you read 0V, but your NCVT pen glows when placed near the hot slot, you likely have an “open neutral” wire.
If you suspect your circuit breaker itself is faulty, we have broken down the costs and procedures in our resources on The Cheapest Ways to Repair a Circuit Breaker and our comprehensive overview of Circuit Breaker Repair.
Diagnosing Flickering Lights and Loose Connections
Flickering or dimming lights are rarely a problem with the lightbulb itself—especially if the issue occurs across multiple fixtures.
First, observe when the flickering happens. If your kitchen lights dim momentarily when your refrigerator or air conditioner kicks on, this is a classic symptom of voltage drop. When a large motor starts, it draws a massive inrush current. If your home has older or undersized wiring, this temporary load causes the voltage to drop across the entire branch circuit.
Second, check for loose wire terminations. Loose connections create high resistance, which can cause lights to flicker randomly and produce an audible buzzing sound. This is a severe fire hazard. If you notice flickering in a single room, turn off the breaker, remove the light switch or receptacle cover, and inspect the wire connections. Ensure all wire nuts are tight and screw terminals are firmly secured around the bare copper wires.
Always check that your lightbulbs do not exceed the maximum wattage rating printed on the fixture. Overlamping (using a 100-watt bulb in a 60-watt rated fixture) generates excessive heat that degrades wire insulation over time, leading to intermittent shorts.
Advanced Diagnostic Methods: Wiring Diagrams and the Hopscotch Method
When basic checks do not resolve the issue, professional electricians rely on systematic diagnostic frameworks to locate faults without tearing down drywall. Two of the most effective methods are schematic analysis and the hopscotch method.
Before starting, it helps to map out the circuit. You can find excellent visual layout strategies and diagnostic trees on the Home Electrical Troubleshooting Strategy – DIY website, which specializes in helping homeowners visualize circuit paths.
The hopscotch method is a highly structured way to locate an open circuit in a series chain of components (like a series of light switches or safety limits in an HVAC system).
To use this method:
- Keep the circuit energized (using extreme caution and wearing rated safety gloves).
- Attach your multimeter’s common (black) lead to a verified ground or neutral point.
- Use the red probe to “hop” step-by-step along the hot path, testing the input and output terminals of each switch, junction, or device in sequence.
- As long as you read 120V, the path up to that point is continuous. The exact moment your meter drops to 0V, you have just crossed the open fault. The break is located between the last point that read 120V and the first point that read 0V.
Another highly efficient logic tool is the half-split method. If you have a circuit with 16 outlets in a row and the last 8 are dead, do not test every single outlet. Go directly to outlet number 8 (the midpoint). If you have voltage there, the fault is in the second half of the circuit. If you do not have voltage, the fault is in the first half. By dividing the remaining possibilities in half with each test, you can isolate a fault in a 20-component circuit in just 4 or 5 tests instead of 20.
DIY vs. Professional Intervention: When to Call a Licensed Electrician
As a homeowner, it is empowering to solve minor electrical issues yourself. However, you must know your limits. Trying to save a few dollars on a complex repair can result in catastrophic property damage or personal injury.
For a deeper look into common household electrical layouts and retired master electrician tips, explore the Trade Secrets – Troubleshooting Home Electrical Problems platform.
Here is a clear breakdown of when you can safely proceed with a DIY fix versus when you must step back and call our licensed team at Energy Co.:
Safe for DIY Troubleshooting:
- Resetting a tripped circuit breaker or GFCI outlet.
- Replacing a worn-out, simple light switch or wall outlet (after verifying the power is completely off).
- Replacing a lightbulb or tightening a loose light fixture collar.
- Unplugging overloaded appliances to redistribute electrical loads.
Requires Immediate Professional Intervention:
- Overheating Panels or Outlets: If your electrical panel door, wall switches, or outlets feel warm to the touch, or if you spot brown scorch marks around receptacle slots, turn off the breaker immediately and call us.
- Persistent Burning Smells: A distinct fishy or plasticky odor near outlets or switches indicates that wire insulation is melting. This is an active electrical fire hazard.
- Breakers That Trip Instantly: If a breaker trips the exact millisecond you try to reset it, you have a “hard short.” Forcing it back on can cause an arc flash.
- Outdated Wiring Systems: If your home was built before 1980 and still contains knob-and-tube or aluminum branch wiring, do not attempt to modify it. Aluminum wiring requires specialized oxide-inhibitor paste and specific CO/ALR rated connectors.
- Main Service Panel or Meter Base Work: Any issue inside your main panel, or involving your external utility meter base, must be handled by a licensed professional.
As a standard safety practice, licensed electricians should inspect residential electrical systems every 10 years for homes built after 1980, and every 5 years for older properties in our Chicagoland service areas.
Frequently Asked Questions
What is the safest way to verify a circuit is de-energized?
The safest way is the “live-dead-live” testing method. First, test your non-contact voltage tester or multimeter on a known live source (like a working outlet) to confirm the tool is functioning correctly. Next, test the target wires or terminals on your de-energized circuit to confirm a 0V reading. Finally, test your tool on the live source once more to ensure it did not fail or run out of battery during your safety check.
Why does my circuit breaker keep tripping immediately after resetting?
When a breaker trips instantly upon resetting, it is signaling a “hard fault”—most commonly a short circuit or a direct ground fault. This means an energized hot wire is in direct physical contact with a neutral or ground wire somewhere along the line. Do not attempt to force the breaker back on, as this can cause severe damage or fire. Leave the breaker off and contact a licensed professional to trace the short.
How often should my home’s electrical system be professionally inspected?
For modern homes built after 1980, we recommend a professional safety inspection every 10 years. For historic or older Chicagoland properties—especially those with active knob-and-tube, aluminum wiring, or older fuse panels—inspections should occur every 5 years to identify degraded insulation, loose terminations, and code compliance issues before they lead to failures.
Conclusion
Systematic electrical troubleshooting is an invaluable skill that helps you keep your home safe, functional, and efficient. By understanding how electricity flows, identifying the differences between open and short circuits, and utilizing tools like multimeters safely, you can easily resolve minor everyday issues like tripped GFCIs or overloaded circuits.
However, electrical systems are complex, and the stakes are incredibly high. If you encounter persistent breaker trips, warm outlets, burning odors, or if you are dealing with the historic, outdated wiring common in older Chicago homes, please do not take unnecessary risks.
At Energy Co., we provide expert, licensed residential and commercial electrical services across Chicagoland—including Chicago, Schaumburg, Hoffman Estates, Elk Grove Village, Rolling Meadows, Palatine, Roselle, Streamwood, Hanover Park, Arlington Heights, and Mount Prospect. Whether you need a quick diagnostic check or complete system rewiring, our team is here to help 24/7 with a 100% satisfaction guarantee.
If you are experiencing issues with non-functional receptacles or switches, save yourself the stress and Get Professional Outlet and Switch Troubleshooting from our local, trusted team today!