Why an LED Recessed Lighting Retrofit is Your Best Ceiling Upgrade
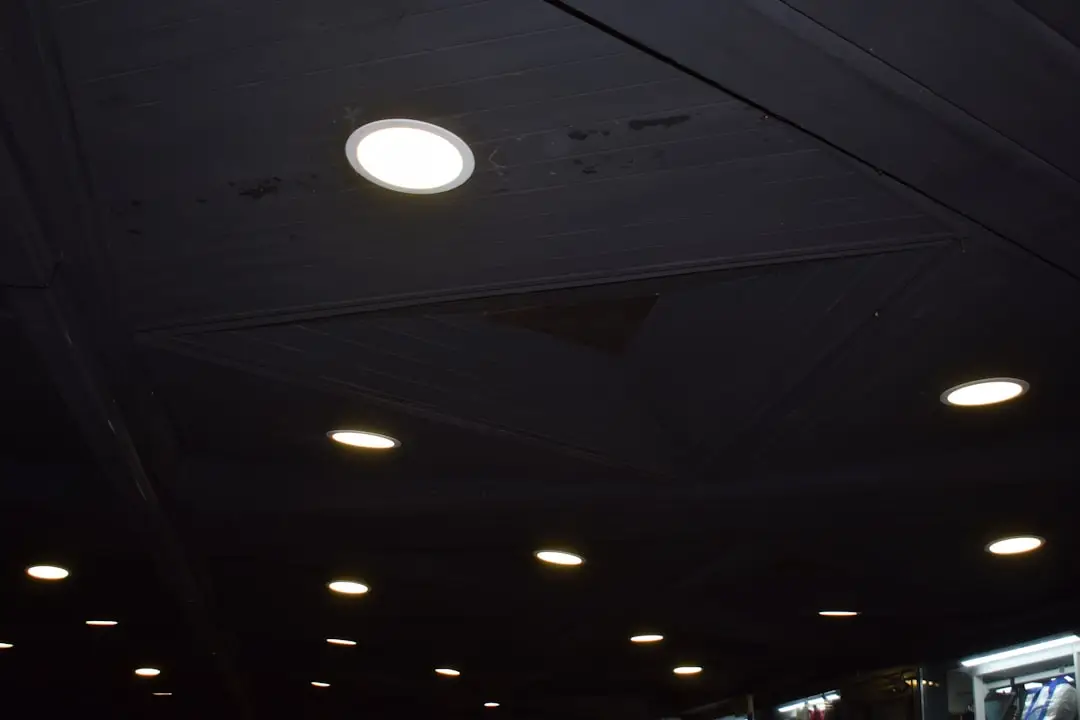
Planning an led recessed lighting retrofit is the fastest and cleanest way to modernize your ceilings, slash your energy bills, and eliminate those hot, yellow bulbs without tearing down your drywall. If you are tired of dated “high hat” fixtures, upgrading to modern LED kits is a simple weekend project that pays for itself in energy savings.
Quick Guide: How to Retrofit Recessed Lights in 3 Steps
- Step 1: Prep and Power Off – Turn off the power at your circuit breaker. Remove the old incandescent bulb and pull down the existing decorative metal or plastic trim.
- Step 2: Connect the Adapter – Screw the included E26 medium-base socket adapter directly into the empty light socket.
- Step 3: Snap and Push – Plug the adapter wire into your new LED downlight, adjust the color temperature switch on the back, and compress the spring clips to slide the fixture flush against the ceiling.
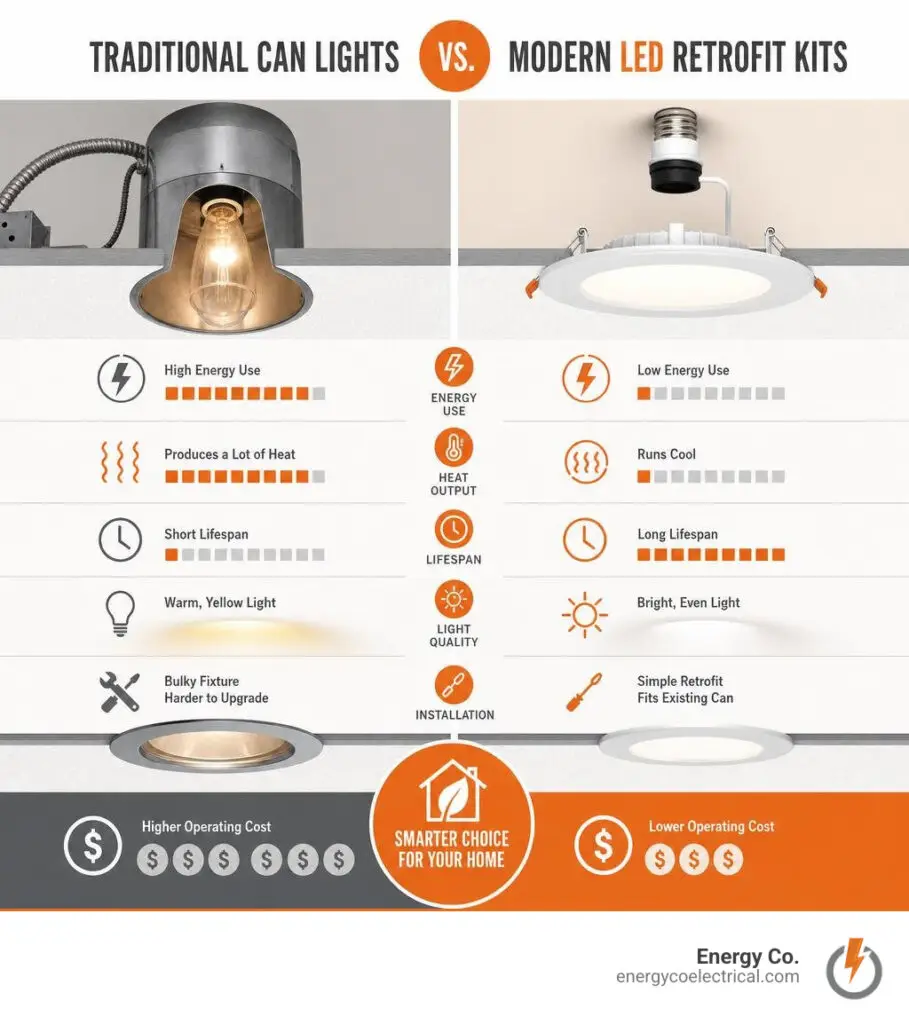
Old-school halogen and incandescent can lights waste up to 85% of their energy as heat. By swapping them out for integrated LED retrofits, you get bright, even light that lasts up to 50,000 hours—all while keeping your existing ceiling cans intact.
My name is Michał Napieralski, and as the lead electrician at Energy Co. in Schaumburg, IL, I have spent years helping Chicagoland homeowners design and install safe, code-compliant led recessed lighting retrofit systems. Let’s look at how to choose the right sizes, shapes, and features to make your home shine.
Why Choose an LED Recessed Lighting Retrofit for Your Home?
Upgrading your home’s lighting is about more than just aesthetics; it is a smart financial move that changes how you experience your living spaces. According to the U.S. Energy Information Administration, lighting accounts for roughly 5% of an average household’s energy budget. By swapping out your old, power-hungry incandescent bulbs for modern LED alternatives, you can target this area for immediate utility bill savings. In fact, replacing just the five most frequently used light fixtures in your home with energy-efficient models can save you about $75 annually.
The efficiency of LED technology is remarkable. Standard incandescent bulbs require 60 to 100 Watts to illuminate a space, while an equivalent LED retrofit downlight operates at high efficiency within a 2 to 17 Watt range. Additionally, because LEDs do not rely on a delicate, fragile filament, they are solid-state and highly durable. If they are bumped or shaken during installation or ceiling maintenance, there is no risk of a broken filament.
Another hidden benefit is heat reduction. Traditional halogens and incandescents act like mini-heaters in your ceiling, increasing the thermal load on your rooms. By transitioning to cool-running LEDs, you prevent heat buildup, which indirectly lowers your indoor air conditioning and cooling costs during hot Chicagoland summers in areas like Cicero, Arlington Heights, and Rolling Meadows.
For comprehensive upgrades beyond DIY projects, our team at Energy Co. offers expert assistance through our residential electrical services to ensure your home’s entire system is modern, safe, and efficient.
Retrofit Kits vs. Full Housing Replacement
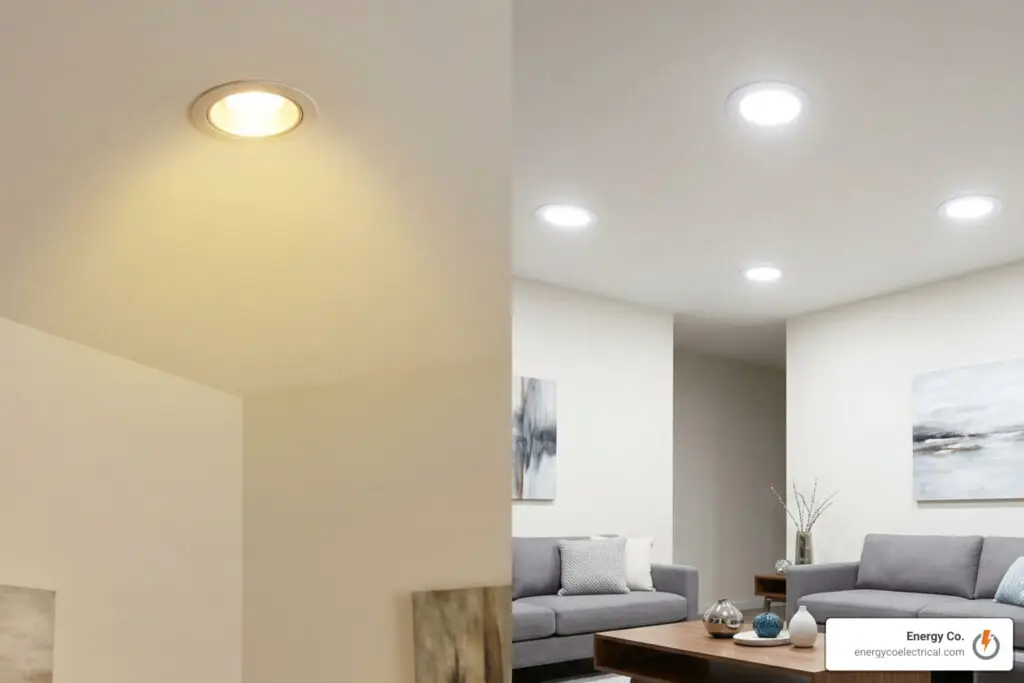
When homeowners in the Northwest Suburbs decide to upgrade their ceiling lighting, they are often faced with a choice: should they install an led recessed lighting retrofit kit or perform a full housing replacement?
A full housing replacement is a major remodeling project. It requires cutting away ceiling drywall, removing the existing metal housing (the “can” or “high hat”), running new wiring, and installing a completely new fixture. This process is labor-intensive, messy, and expensive. It also requires drywall patching, sanding, and painting to restore the ceiling’s appearance.
An LED retrofit kit, on the other hand, is designed to be a “plug-and-play” solution. It allows you to reuse your existing recessed cans. The retrofit kit includes an integrated LED light source, a pre-attached trim, and a medium-base socket adapter (usually an E26 screw-in base). You simply remove the old bulb and trim, screw the adapter into the existing socket, plug in the new LED unit, and slide it into place.
This process avoids costly ceiling damage, saves hours of labor, and reduces waste by keeping the original metal housing in your ceiling. It is a seamless, cost-effective way to get the clean look of new recessed lights without the headache of a full remodel.
Key Features to Look For in an LED Recessed Lighting Retrofit Kit
When shopping for the perfect retrofit kit, you will find a massive selection of products on the market. In fact, online marketplaces like Amazon list over 6,000 results for “Retrofit LED Lights,” with popular models holding customer ratings of 4.4 to 4.7 out of 5 stars. To find the best kit for your home, focus on these essential features:
- Color Temperature (CCT Selectability): Light color is measured in Kelvin (K). Modern retrofit lights often feature “5CCT” selectable color temperatures. This means a physical toggle switch on the back of the fixture allows you to choose between 2700K (Soft/Warm White), 3000K (Warm White), 3500K (Neutral White), 4000K (Cool White), and 5000K or 6500K (Daylight) before you slide the light into the ceiling. This eliminates the guesswork of buying the wrong color tone.
- Lumens (Brightness): Do not look at wattage to judge brightness; look at lumens. A 12W to 13W LED retrofit typically produces between 800 and 1,050 lumens, easily replacing a traditional 60W to 75W bulb. If you have lower ceilings, a 4-inch, 11W kit producing 660 lumens might be perfect, whereas high ceilings may require high-output fixtures producing up to 1,500 lumens.
- Dimmability: Most high-quality retrofits offer seamless dimming from 100% down to 10%. However, you must pair them with a compatible LED-rated dimmer switch to avoid annoying humming or flickering.
- Color Rendering Index (CRI): CRI measures how accurately a light source reveals the true colors of objects compared to natural sunlight. Look for a CRI rating of 90 or higher. A 90+ CRI rating ensures that paint colors, wood grain, and food in your kitchen look vibrant, bold, and true-to-life.
For an adjustable option that lets you direct light precisely where you need it, the Feit Electric 4-Inch Adjustable LED Downlight is an excellent choice, featuring a 90+ CRI rating and an adjustable eyeball trim that is ideal for sloped ceilings or highlighting artwork.
Selecting the Right Size, Shape, and Trim for Your Ceiling
Choosing the right physical attributes for your retrofit downlights is crucial to achieving a professional finish. The most common nominal sizes for residential recessed cans are 4-inch and 5/6-inch (which are designed to fit both 5-inch and 6-inch housings). Before purchasing, always measure the inside diameter of your existing metal cans to guarantee a snug fit.
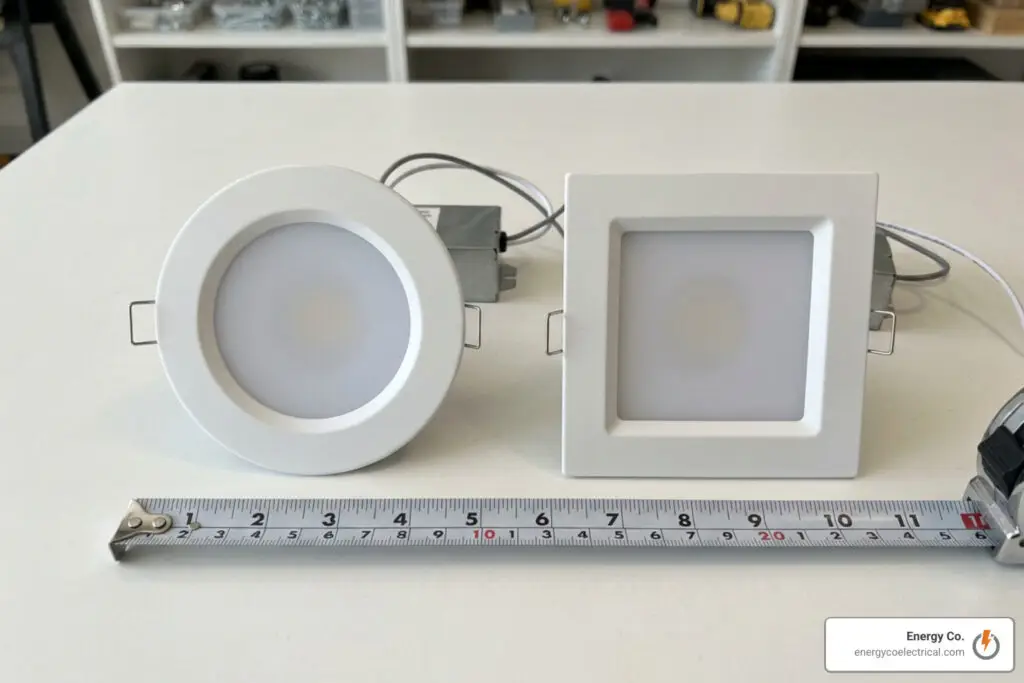
While round trims are the traditional standard, square retrofit kits are also available. Square trims can instantly give a room a modern, architectural feel. What is great about square retrofits is that they are designed to fit directly into your existing round cans, meaning you do not have to change the ceiling cutouts to update your home’s aesthetic.
| Trim Type | Visual Style | Glare Control | Best Applications |
|---|---|---|---|
| Baffle Trim | Features grooved ridges | Excellent (reduces glare and softens light) | Living rooms, bedrooms, and general family spaces |
| Smooth Trim | Clean, flat, and modern | Moderate (maximizes light output) | Kitchens, hallways, and modern minimalist spaces |
| Gimbal Trim | Pivoting, adjustable light head | High (allows directional control) | Sloped ceilings, accent walls, and art displays |
Understanding Trim Types: Baffle, Smooth, and Gimbal
The trim is the visible outer portion of the light fixture that sits flush against your ceiling. The style you choose will affect both the look of the room and the way the light is dispersed:
- Baffle Trim: This is the most popular residential choice. Baffle trims feature grooved ridges inside the cone. These ridges absorb excess light, reducing glare and providing a softer, more comfortable glow. If you are looking for a reliable, high-quality option, the Sunco 5/6-Inch Selectable CCT Retrofit Kit offers a smooth, glare-reducing design that delivers 965 lumens of customizable light.
- Smooth Trim: Smooth trims have a clean, flat interior wall. They offer a highly modern, minimalist aesthetic and maximize overall light output. They are perfect for task-oriented spaces like kitchens and home offices where bright, direct light is desired.
- Gimbal Trim: Also known as eyeball trims, gimbal downlights feature a pivoting inner light head. This allows you to tilt the light up to 45 degrees to direct the beam exactly where you want it. Gimbal trims are essential for homes with sloped ceilings to keep the light pointing straight down, or for highlighting architectural features and wall-mounted artwork.
What is a Goof Ring and When Do You Need One?
During a home renovation or a DIY lighting upgrade, things do not always go perfectly. If you pull down your old, bulky metal trims, you might discover that the original drywall cuts around the cans are messy, jagged, or slightly too large. This leaves an unsightly gap between your new, sleek LED retrofit trim and the ceiling drywall.
This is where a goof ring (also known as a trim ring) comes to the rescue.
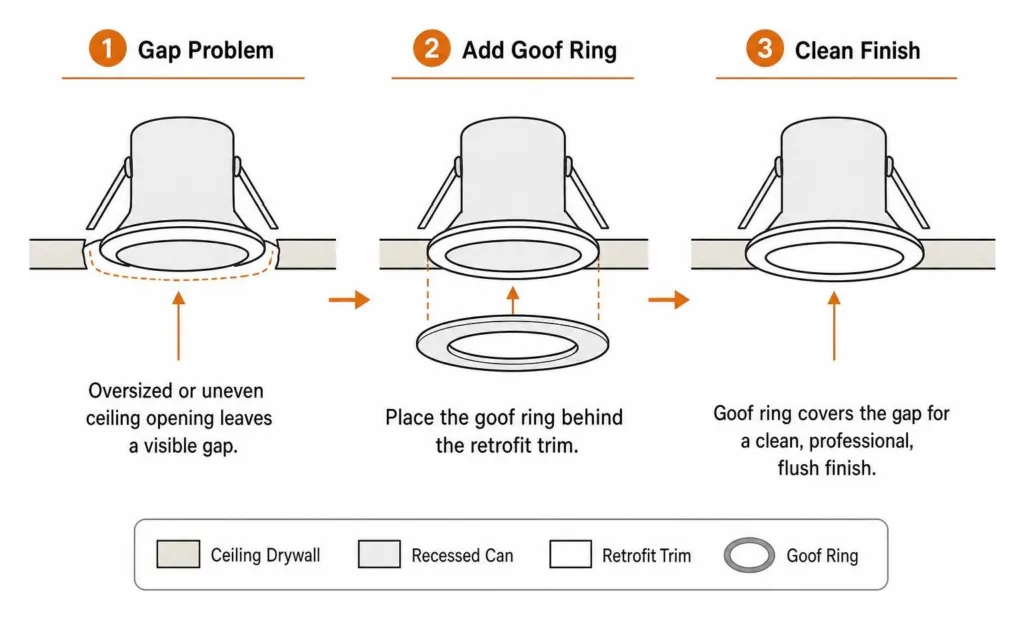
A goof ring is a thin, flat plastic or metal ring designed to sit behind the retrofit light’s built-in trim. It extends the outer diameter of the fixture, easily covering up drywall mistakes, paint lines, or oversized holes. It provides a clean, professional, and flush finish without requiring you to patch and paint the ceiling drywall.
How to Safely Install Your New LED Downlights
While retrofitting is a highly accessible DIY project, working with electricity always requires caution. Before starting, you must understand the two primary connection types used in recessed cans: the standard E26 screw-in adapter (which looks like the base of a regular light bulb) and the orange TP24 quick-connect plug (commonly found in newer, dedicated LED cans).
Before you begin, read through our detailed Upgrade Your Ceiling: A Step-by-Step Recessed Lighting LED Retrofit Guide for advanced tips on layout planning and wiring safety.
Step-by-Step LED Recessed Lighting Retrofit Installation Guide
Follow these steps to safely complete your installation:
- Cut the Power: Go to your home’s main electrical panel and switch off the circuit breaker controlling the lights you will be working on. Verify the power is off by trying to turn the wall switch on.
- Remove Old Components: Unscrew the existing light bulb. Gently pull down the old decorative trim. Unhook the springs or clips holding the old trim inside the can and discard both the bulb and trim.
- Select Your Color Temperature: Before installing the new unit, locate the CCT toggle switch on the back of the LED retrofit and slide it to your preferred setting (e.g., 3000K for a warm kitchen, or 4000K for a clean workspace).
- Connect the Adapter: Screw the E26 medium-base adapter into the empty light socket inside the can. If your existing can has a newer TP24 connector, you can skip the E26 adapter and plug the retrofit directly into the housing connector.
- Plug in the LED Module: Connect the orange quick-connect plug from the adapter to the matching plug on the back of the new LED retrofit fixture.
- Secure the Springs: Compress the torsion springs (the V-shaped metal wires) on both sides of the retrofit unit and hook them into the mounting brackets inside the ceiling can. If your can uses friction slots instead of brackets, adjust the spring clips to slide tightly against the metal walls.
- Push Flush: Gently push the retrofit unit upward into the can until the trim sits perfectly flush and tight against your ceiling. Restore power at the breaker and test your beautiful new lights!
Safety Certifications and Environmental Ratings to Check
When purchasing your retrofit kits, do not just look at price. Ensure your safety and peace of mind by checking for these industry certifications:
- UL or ETL Listed: These marks indicate that the product has been rigorously tested by independent safety laboratories to meet national safety standards.
- Energy Star Certified: This guarantees the fixture meets strict energy efficiency and performance standards, ensuring it will deliver on its promised utility savings.
- IC-Rated (Insulation Contact): If your recessed cans are installed in an insulated attic ceiling, they must be IC-rated. This means the fixture is safe to be in direct contact with ceiling insulation without creating a fire hazard.
- Damp vs. Wet Location Ratings: Standard retrofits are “Damp Rated,” meaning they can handle high humidity but not direct water splashes. They are perfect for kitchens, laundry rooms, and covered outdoor patios. However, if you are installing a light directly inside a shower stall or on an exposed outdoor soffit, you must use a “Wet Rated” fixture to prevent moisture from damaging the internal electronics.
Frequently Asked Questions About LED Retrofits
Can I install LED retrofit kits in older Chicago homes with historic wiring?
Yes, but with caution. Many historic homes in Chicago and surrounding suburbs like Oak Park, Cicero, and Evanston still feature older wiring systems, such as knob-and-tube or early BX (metal-armored) cable.
While the low power draw of LED retrofits actually reduces the electrical load on these older systems, the physical connections inside the ceiling cans must be inspected. Older wiring insulation can become brittle over time. If you disturb the wires while pulling down old trims, you risk cracking the insulation and creating a short circuit. If your home has historic wiring, it is highly recommended to have a licensed electrician evaluate your system before proceeding.
Why are my new LED retrofit lights flickering or buzzing?
Flickering, buzzing, or a limited dimming range are almost always caused by compatibility issues between your new LED drivers and your old wall dimmer switches.
Older dimmer switches were designed for high-wattage incandescent bulbs (using Triac dimming). Because LEDs draw so little power, these older dimmers cannot properly regulate the current, leading to electrical noise (buzzing) or rapid on-off cycling (flickering). To resolve this, you should replace your old wall switches with modern, LED-compatible dimmers.
What is the difference between damp-rated and wet-rated retrofit fixtures?
Damp-rated fixtures are designed for areas exposed to moisture and condensation but not direct liquid water. Examples include bathrooms (outside the shower zone), kitchens, covered porches, and basements.
Wet-rated fixtures feature specialized gaskets and sealed compartments that prevent water from entering the light housing. You must use wet-rated retrofits inside shower stalls, above bathtubs, or on outdoor soffits where wind-driven rain could contact the fixture.
Conclusion
Upgrading your home with an led recessed lighting retrofit is one of the most rewarding home improvement projects you can undertake. It instantly modernizes your living spaces, improves visual comfort, and lowers your monthly energy bills.
While many homeowners enjoy tackling this as a DIY project, dealing with older wiring, installing new dimmer switches, or navigating high ceilings can sometimes present unexpected challenges. That is where we come in. At Energy Co., our licensed, professional electricians serve Chicago and the surrounding suburbs—from Schaumburg and Palatine to Rolling Meadows and beyond. We bring local expertise, code compliance, and a satisfaction guarantee to every project we touch.
If you are ready to upgrade your residential or commercial property with high-performance, energy-saving LED retrofits, let our team handle the work safely and professionally. Check out our guide on Shining a Light on Commercial Lighting Services and Retrofits or contact us today to schedule your consultation!