Estimating Whole-Home Generator Installation Costs
Estimating the price tag for backup power requires evaluating equipment ratings, structural logistics, and system integration needs. On average, standard installations range from $8,000 to $16,000, covering the unit, transfer equipment, site prep, and labor. However, extensive custom projects—such as long gas line runs or major service panel rebuilds—can push total costs up to $25,000. For flexibility, standard home standby units can often be financed for around $109 per month.
To explore deeper financial breakdowns, review The Definitive Guide to Standby Generator Installation Costs.
| Generator Capacity | Application Scope | Key Installation Requirements | Estimated Total Cost |
|---|---|---|---|
| 8 kW – 11 kW | Essential Circuits (Sump pump, fridge, lights) | 100A Transfer Switch, short gas line run | $7,000 – $10,000 |
| 12 kW – 16 kW | Managed Whole-Home (Essential loads + 1-2 AC units) | 100A–200A ATS, moderate panel updates | $9,000 – $13,000 |
| 18 kW – 26 kW | Full Whole-Home Coverage (Large homes, multi-HVAC) | 200A Service Disconnect ATS, gas meter upgrade | $12,000 – $18,000 |
| Industrial / Commercial (100+ kW) | Facilities, Factories, Heavy Commercial | Heavy concrete slab, high-capacity fuel tanks | $25,000+ |
Calculating Generator Power Capacity and Load Requirements
Proper sizing starts with a comprehensive electrical load calculation rather than guessing based on home square footage alone. System sizing falls into two primary categories:
- Essential Circuit Systems: Isolates designated emergency circuits—such as your furnace, refrigerator, sump pump, and security system—via a dedicated subpanel.
- Managed Whole-Home Systems: Uses software-driven load shedding modules to protect the entire property. The system momentarily drops high-draw loads (like central air units) when power demand spikes, keeping the overall required generator size lower.
Calculating electrical loads ensures your home standby unit has sufficient power to handle high-starting-wattage induction motors (like sump pumps and air conditioners) without stalling out.
Material and Labor Factors Affecting Total Price
Base equipment prices are only part of the equation; site-specific structural and electrical variables dictate the final balance:
- Electrical Panel Upgrades: Older properties in areas like Schaumburg or Hoffman Estates often feature 100-amp main panels that cannot support a generator switch integration without an upgrade to 200 amps.
- Fuel Line Distance: Trenching and running hard gas lines from the utility meter to the unit incurs material and labor costs. Fitting friction losses (+2.5 feet of equivalent pipe length per elbow or tee) require larger pipe diameters over long runs.
- Gas Meter Upgrades: If your natural gas meter lacks the total BTU delivery capacity for both household heating appliances and the generator at 100% load, the gas utility must install a higher-volume meter.
Preparing the Property Site and Safety Clearances
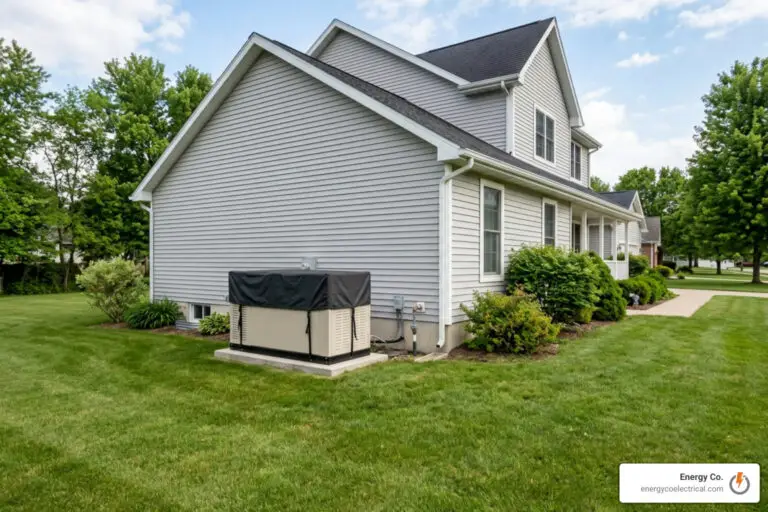
Site selection sets the foundation for a reliable installation. The generator must sit outdoors on high, well-drained ground to prevent water accumulation from damaging delicate internal electronics or rust-proofing the lower chassis.
To understand safety standards for placement, read How to Safely Install a Backup Generator for Your Home.
Concrete Pad and Foundation Site Preparation
A stationary standby unit requires a sturdy, level base to handle heavy engine vibration:
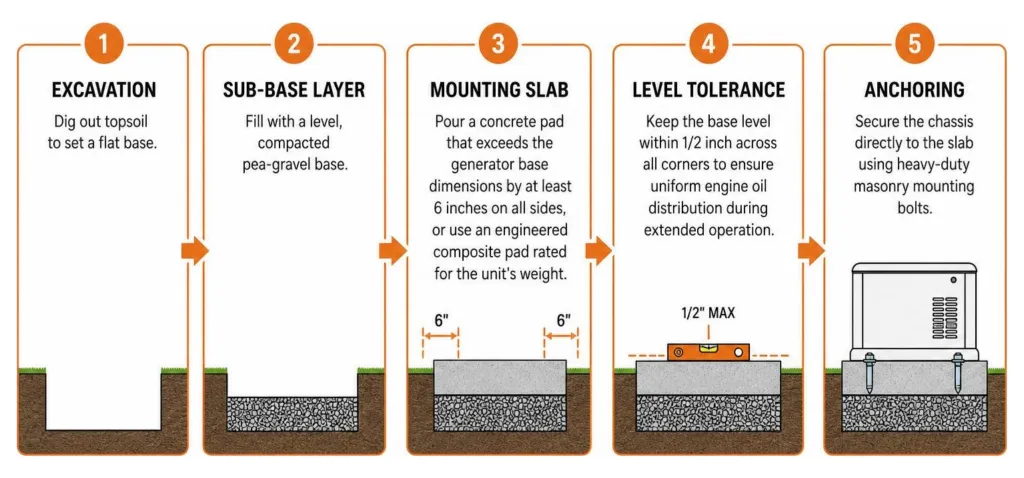
- Excavation: Dig out topsoil to set a flat base.
- Sub-base Layer: Fill with a level, compacted pea-gravel base.
- Mounting Slab: Pour a concrete pad that exceeds the generator base dimensions by at least 6 inches on all sides, or use an engineered composite pad rated for the unit’s weight.
- Level Tolerance: Keep the base level within 1/2 inch across all corners to ensure uniform engine oil distribution during extended operation.
- Anchoring: Secure the chassis directly to the slab using heavy-duty masonry mounting bolts.
Carbon Monoxide Hazards and Fire Safety Clearances
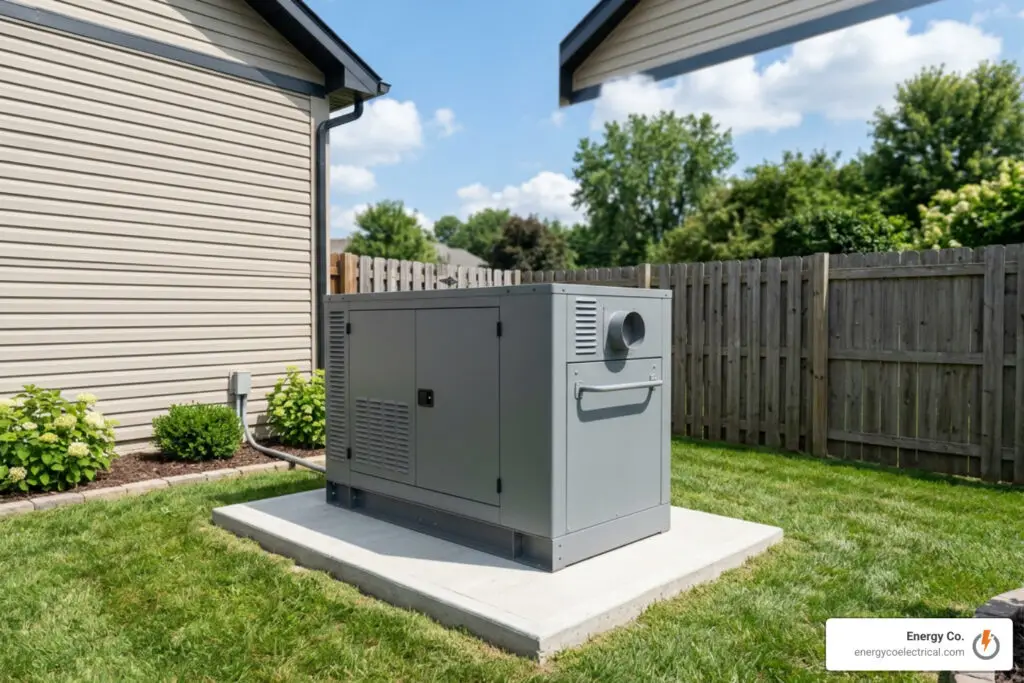
Engine exhaust emits carbon monoxide (CO), a deadly, colorless, and odorless gas. Strict adherence to NFPA 37 (Stationary Combustion Engines) and NFPA 70 (National Electrical Code) rules is essential:
- Structure Clearances: Position the generator at least 5 feet away from operable doors, windows, and wall vents.
- Exterior Wall Spacing: Maintain a minimum of 18 inches clearance from non-combustible building walls.
- Vertical Clearance: Ensure at least 60 inches (5 feet) of open vertical headroom above the generator enclosure; never set a unit under low roof overhangs or wooden decks.
- Side Clearances: Keep 36 inches of clear space around the front and service sides for routine technician access.
- Safety Alarms: Install battery-operated carbon monoxide alarms on every level of the home.
The Step-by-Step Electrical and Fuel Connection Process
Installing a standby unit requires seamless coordination between electrical wiring and fuel piping systems.
Transfer Switch Wiring and Electrical Integration for Generator Installation
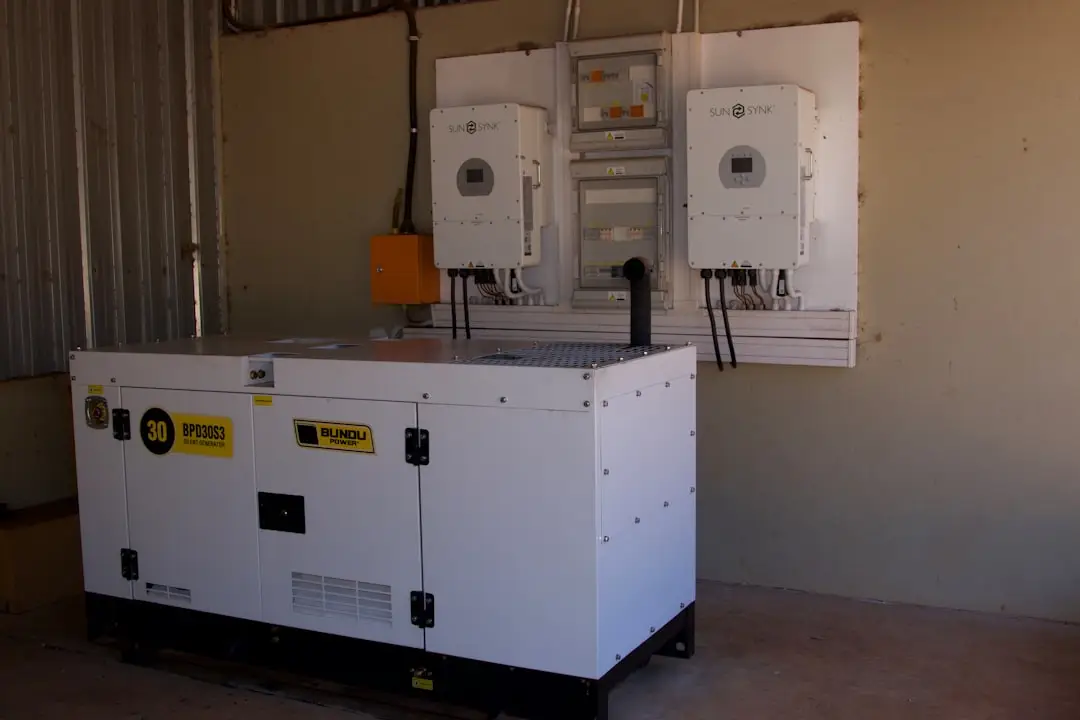
The automatic transfer switch (ATS) is the brain of your backup system. It continuously monitors incoming utility power:
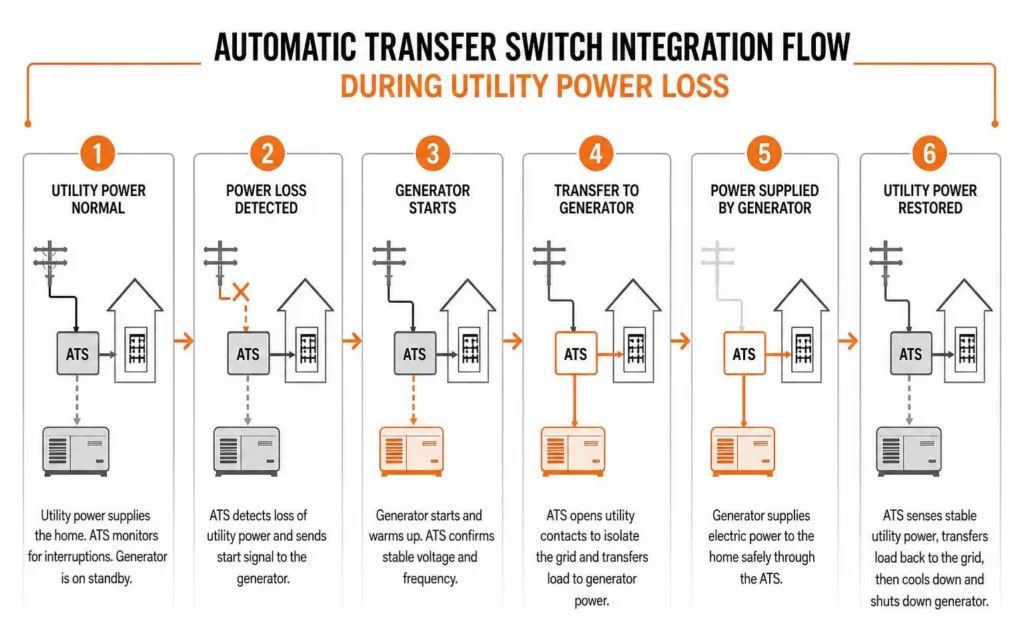
When grid power drops, the ATS signals the engine to start, isolates the main panel from the grid to prevent dangerous utility backfeeding, and routes standby power into the building.
Pre-wired distribution panels must comply with current NEC rules. Where local codes require Arc Fault protection, pre-wired switches accept specialized AFCI breakers (such as Siemens Q115AF or Q120AF). Furthermore, standard NEC guidelines implemented in 2021 mandate whole-home surge protection to protect sensitive home electronics from severe power spikes during grid restoration.
Natural Gas and Liquid Propane Fuel Piping Sizing
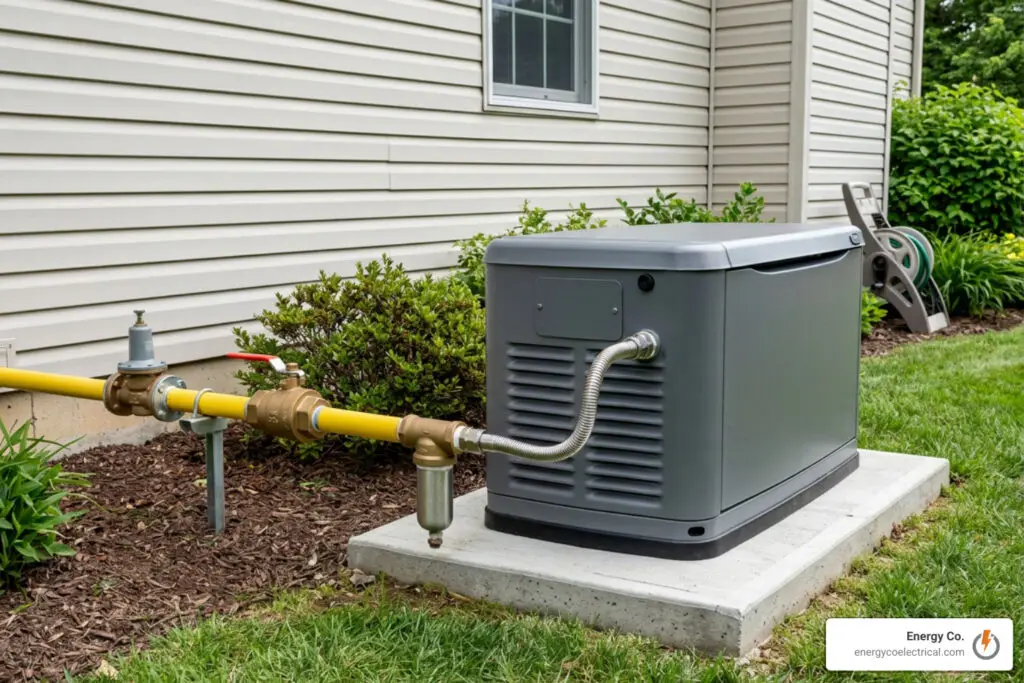
Standby generators require a full-flow fuel supply to handle engine load changes. Whether running natural gas (NG) or vapor-withdrawn liquid propane (LP), proper line setup is vital:
- 100% Load BTU Sizing: Fuel lines must be sized to deliver the generator’s 100% loaded BTU requirement, regardless of expected running electrical loads.
- Friction Loss Additions: When calculating overall pipe run length, add 2.5 feet of equivalent length for every elbow, tee, or drip leg.
- Valving: Use only full-flow-rated shutoff valves matching the full internal diameter of the gas pipe.
- Pressure Regulation: Primary fuel regulators must reduce incoming gas pressure to between 5 and 14 inches of water column prior to entering the unit’s internal fuel shutoff valve.
For a deeper dive into safe fuel line setup, check out Dont Blow It A Guide to Standby Generator Gas Line Setup.
Permitting, Municipal Inspections, and Overall Project Timeline
Installing a home standby system is not a single-day DIY project. It requires multi-agency oversight to ensure occupant safety and municipal compliance.
For detailed suburban permitting steps, see Cook County Generator Installation From Permits to Power Up.
Navigating Municipal Codes and Electrical Permits
Local building authorities enforce strict safety codes before approving power generation equipment. In communities like Schaumburg, official planning resources such as the municipal Generator Resource Guide outline exact site requirements, plan review submissions, and trade submittals.
Requirements typically include:
- Building and Structural Permits: Covers zoning clearances, property set-backs, and concrete pad mounting details.
- Electrical Permits: Validates transfer switch sizing, wiring schematics, panel connections, ground fault protection, and surge protection devices.
- Plumbing/Fuel Permits: Reviews fuel line pipe sizing, pressure drop calculations, buried pipe trench depth, and emergency shutoff valve locations.
- HOA Regulations: Many homeowners associations maintain aesthetic rules regarding exterior equipment placement, sound dampening enclosures, and screening hedges.
Understanding the Timeline From Consultation to Final Testing
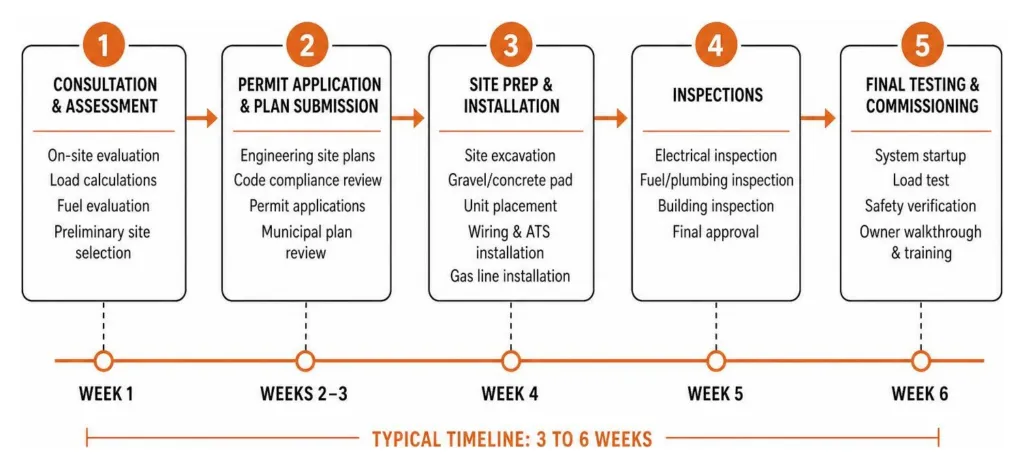
While setting the unit and running connections takes only a day or two of physical labor, the end-to-end timeline typically spans 3 to 6 weeks:
- Initial On-Site Consultation (Week 1): Performing load calculations, fuel evaluation, and preliminary site selection.
- Permit Application & Plan Submission (Weeks 2–3): Drafting engineering site plans and awaiting municipal plan review approval.
- Site Prep & Physical Installation (Week 4): Excavating site, laying gravel/concrete, mounting unit, wiring ATS, and running gas lines.
- Municipal Inspections (Weeks 4–5): Passing required local electrical and plumbing inspections.
- Startup & Outage Simulation (Week 6): Commissioning the generator, executing a simulated utility blackout, and verifying automatic transfer switch operation under full load.
Ongoing System Maintenance and Long-Term Reliability
A standby generator is an investment designed to provide reliable power for 15 to 25 years (and in some cases up to 30 years with routine care). Keeping it operating reliably requires scheduled preventative service.
Scheduled Service and 100-Hour Maintenance Rules
Standard standby generators perform an automatic weekly self-test (cycling engine oil and exercising components for 5 to 12 minutes). However, continuous operation during severe weather places heavy demands on the engine:
- Annual Multipoint Service: Perform complete maintenance once per year, including oil and filter replacement, air filter service, spark plug gapping, and control panel battery testing.
- The 100-Hour Rule: If your generator runs continuously during an extended grid outage, perform an oil change and complete system check every 100 operating hours.
- Electrical Connection Check: Inspect and tighten mechanical wiring lugs and fuel connection fittings annually to offset regular engine vibration.
Essential Maintenance Checklist
- Inspect engine oil level and top off with recommended synthetic oil.
- Check fuel pressure using a manometer at the regulator test port.
- Test control battery charge voltage and clean terminal connections.
- Inspect air filter element and replace if clogged with dirt or debris.
- Perform load bank or simulated utility outage switchover test.
- Clear external enclosure vents of leaves, snow, and debris.
Lifespan Maximization for Residential Standby Systems
Maximizing system operational life depends on proper initial setup and ongoing care:
- Correct Engine Sizing: Under-sizing a unit forces the engine to run constantly at peak capacity, accelerating engine wear.
- Quality Power Quality: Combined with whole-home surge protection, steady operational power output shields delicate household electronics against voltage fluctuations.
- Routine Preventative Maintenance: Adhering to manufacturer maintenance schedules prevents mechanical failures when emergency grid outages strike.
Frequently Asked Questions
How much does it cost to install a whole-home standby generator?
Most residential standby installations total between $8,000 and $16,000, covering equipment, materials, and labor. Smaller essential-circuit units start near $7,000, while complex whole-home setups requiring service panel upgrades or long gas line trenches can reach $25,000.
What site preparation is required before installing a unit?
Site prep requires excavating a level base area, placing compacted pea gravel, and pouring a 4-inch concrete pad (or setting an approved engineered pad) that extends at least 6 inches beyond the generator frame on all sides. Clearances must maintain at least 5 feet from building doors and windows and 18 inches from exterior walls to manage carbon monoxide risks and satisfy fire safety codes.
What post-generator installation maintenance is required for long-term reliability?
Schedule professional service annually (or after every 100 hours of continuous runtime during an extended outage). Essential tasks include engine oil and filter changes, battery voltage testing, spark plug checks, fuel pressure verification with a manometer, and clearing airflow intake louvers.
Conclusion
Installing a standby backup power system is one of the most effective ways to protect your property, essential appliances, and family comfort from unpredictable electrical outages. From computing system electrical loads and pouring level concrete foundations to navigating local building permits and installing automatic transfer switches, every detail matters for safe, reliable backup power.
At Energy Co., our team of licensed electrical professionals brings deep expertise to every project across Schaumburg, Hoffman Estates, Elk Grove Village, Palatine, Chicago, and the surrounding Chicagoland communities. Whether you need an electrical panel upgrade, emergency service, or seamless whole-home backup power planning, we deliver reliable, code-compliant craftsmanship backed by our local satisfaction guarantee.
Ready to protect your home against the next storm? Explore our complete Reliable Generator Installation Service to get started today.