What Every Homeowner Should Know About Residential Wiring Installation
Residential wiring installation is the process of running electrical cables, connecting circuits, and installing devices — like outlets, switches, and breakers — to safely deliver power throughout your home.
Here’s a quick overview of what it involves:
| What | Why It Matters |
|---|---|
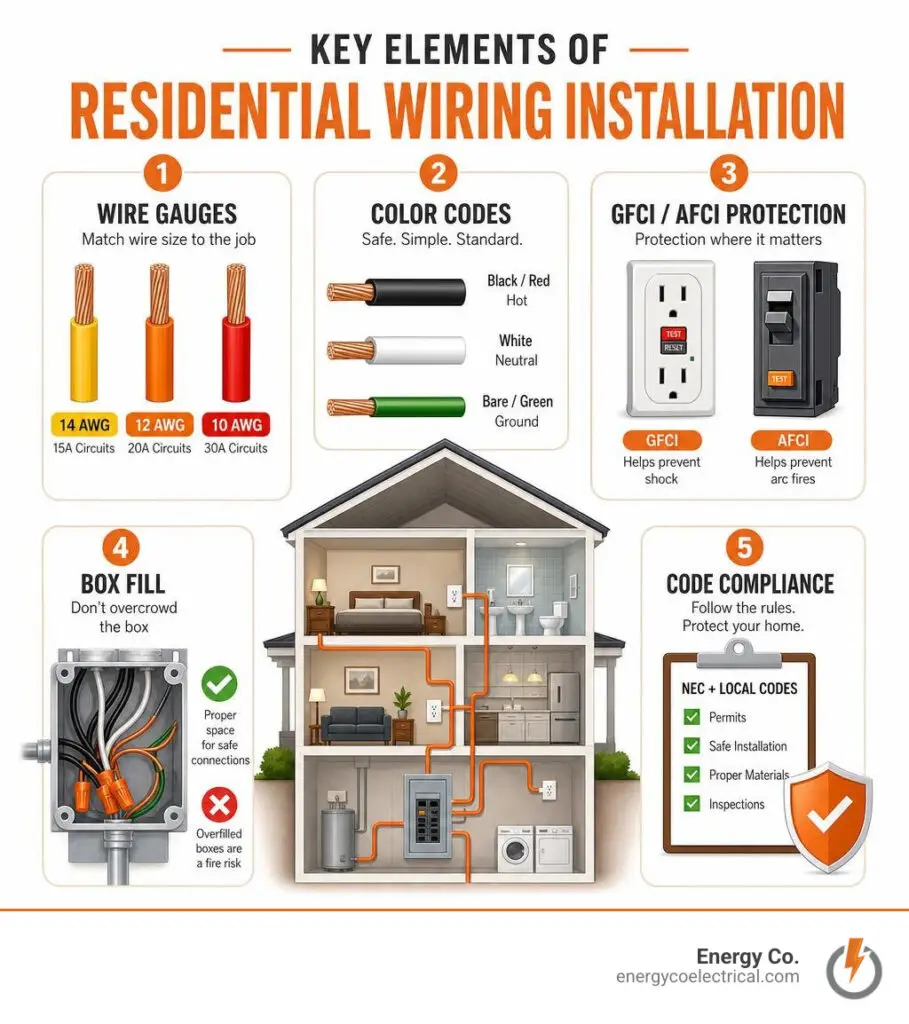
| Correct wire gauge (14, 12, or 10 AWG) | Prevents overheating and fire |
| Proper color coding (black/red = hot, white = neutral, bare/green = ground) | Ensures safe, readable connections |
| GFCI and AFCI protection | Guards against shock and arc fires |
| Junction boxes for all splices | Contains sparks, prevents hidden hazards |
| Code compliance (NEC + local rules) | Required for inspections and insurance |
The average home hides nearly two miles of electrical cable behind its walls, ceilings, and floors. Most homeowners never see it — until something goes wrong. A tripped breaker, a flickering light, or a burning smell near an outlet can all point to wiring problems that carry real fire and shock risks.
Getting wiring right isn’t just about following a checklist. It’s about understanding which wire goes where, why certain rules exist, and what can go seriously wrong when shortcuts are taken. That’s true whether you’re building new, renovating an older Chicago home, or troubleshooting an electrical issue right now.
I’m Michał Napieralski, and through my work at Energy Co. — serving homeowners and businesses across Schaumburg and the greater Chicago area — I’ve seen how proper residential wiring installation protects families and prevents costly damage. In this guide, I’ll walk you through everything you need to know, from wire gauges and cable types to safety codes and common mistakes.
Key Components of a Home Electrical System
Before we look at the wires themselves, it helps to understand the larger system they feed into. Your home’s electrical system is a carefully balanced network designed to distribute power safely from the municipal grid down to your individual appliances.
Service Panels and Breakers
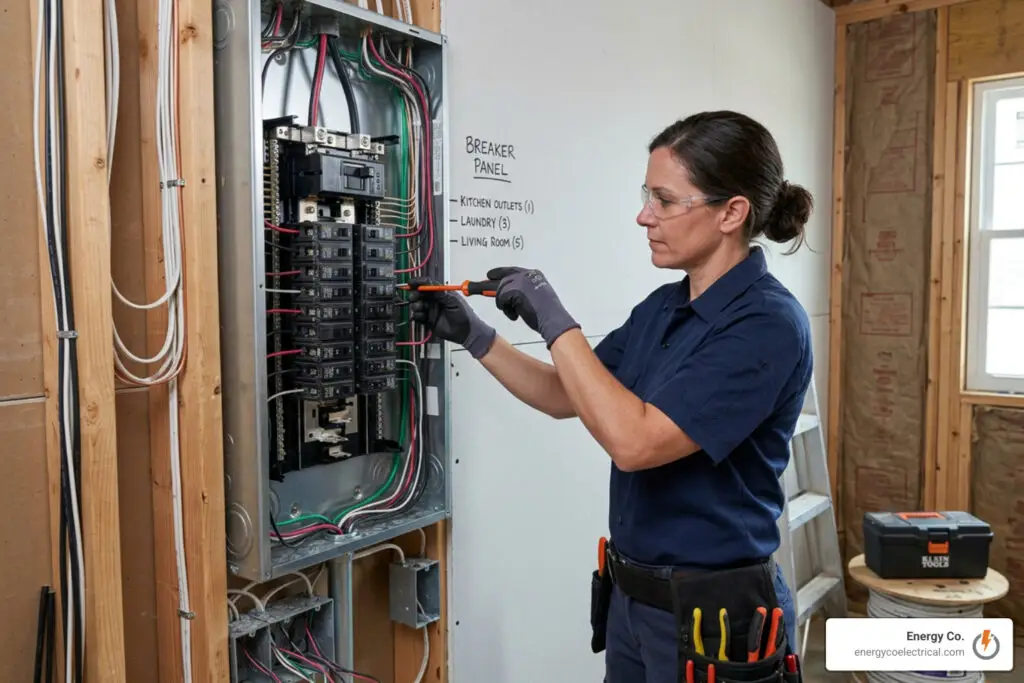
The electrical service panel (often called the breaker box) is the central distribution point for your entire home. Electricity enters your property through the utility service lines, passes through your meter, and feeds directly into this panel.
The main breaker inside the panel dictates the overall amperage capacity of your home. While older homes in the Cook County area might still have legacy 60-amp or 100-amp panels, modern standards call for a minimum of 200 amps to handle today’s heavy electrical loads, such as central air conditioning, electric vehicle (EV) chargers, and high-end kitchen appliances. If you are planning an upgrade, read The Homeowner Guide to Buying a 200-Amp Electrical Panel to understand how this component acts as the foundation of your system.
From the main panel, power is divided into individual branch circuits. Each branch circuit is protected by its own circuit breaker. These breakers act as automatic safety switches. If a circuit draws more current than it is rated for—say, if you plug a space heater and a hair dryer into the same outlet—the breaker trips, cutting off the power to prevent thermal overload and electrical fires.
Grounding and Bonding
While breakers protect your electrical system from drawing too much current, grounding and bonding protect you from electrocution.
- Grounding connects your home’s electrical system directly to the earth. This is typically achieved by running a heavy copper wire from your service panel to metal grounding rods driven deep into the dirt outside, or by connecting to a concrete-encased electrode (commonly known as a UFER ground) in the home’s foundation.
- Bonding refers to physically connecting all metal components of your electrical system—such as metal conduit, junction boxes, and copper water pipes—together to form a continuous, low-resistance path back to the service panel.
If a hot wire accidentally comes loose inside an appliance and touches a metal housing, the bonding system ensures the current flows immediately back to the panel, tripping the breaker. Without proper grounding and bonding, that metal housing would remain energized, waiting to shock the next person who touches it.
Essential Safety and Code Compliance in Residential Wiring Installation
When it comes to electrical work, safety and code compliance are inseparable. The guidelines we follow aren’t arbitrary rules meant to make projects more difficult; they are physical laws translated into safety standards to prevent property damage and save lives.
All professional work starts with the National Electrical Code (NEC), which is revised every three years to incorporate new safety technologies. However, local municipalities often enforce their own stricter amendments. Working without a permit or ignoring these codes can void your property insurance and create severe hazards. If you want to understand how these standards are applied in the field, check out A Practical Guide to Electrical Installation for a deeper dive.
AFCI and GFCI Protection Requirements
Modern building codes place a massive emphasis on advanced safety breakers and receptacles, specifically GFCIs and AFCIs.
- Ground-Fault Circuit Interrupters (GFCI): These devices are engineered to protect people from electrical shock. They constantly monitor the balance of current leaving the hot wire and returning on the neutral. If they detect a loss of current as small as 4 to 6 milliamperes—indicating that electricity is escaping through an alternative path, such as water or a human body—the GFCI cuts off power in milliseconds. Because of this, GFCIs are strictly required in all moisture-prone areas, including kitchens, bathrooms, unfinished basements, crawl spaces, garages, and outdoor locations.
- Arc-Fault Circuit Interrupters (AFCI): While GFCIs protect against shocks, AFCIs protect against fires. They use advanced microprocessors to detect dangerous electrical arcing—the sparking that occurs when a wire is nicked by a drywall screw, chewed by a rodent, or loose inside a wall. These microspikes in current can easily ignite surrounding insulation and wood. The NEC now requires AFCI protection on almost all 15-amp and 20-amp branch circuits supplying outlets, switches, and lighting in family rooms, dining rooms, bedrooms, and hallways.
For a detailed look at how these safety devices are integrated into residential layouts, you can consult the official Residential Wiring Guide.
Chicago-Specific Conduit Regulations
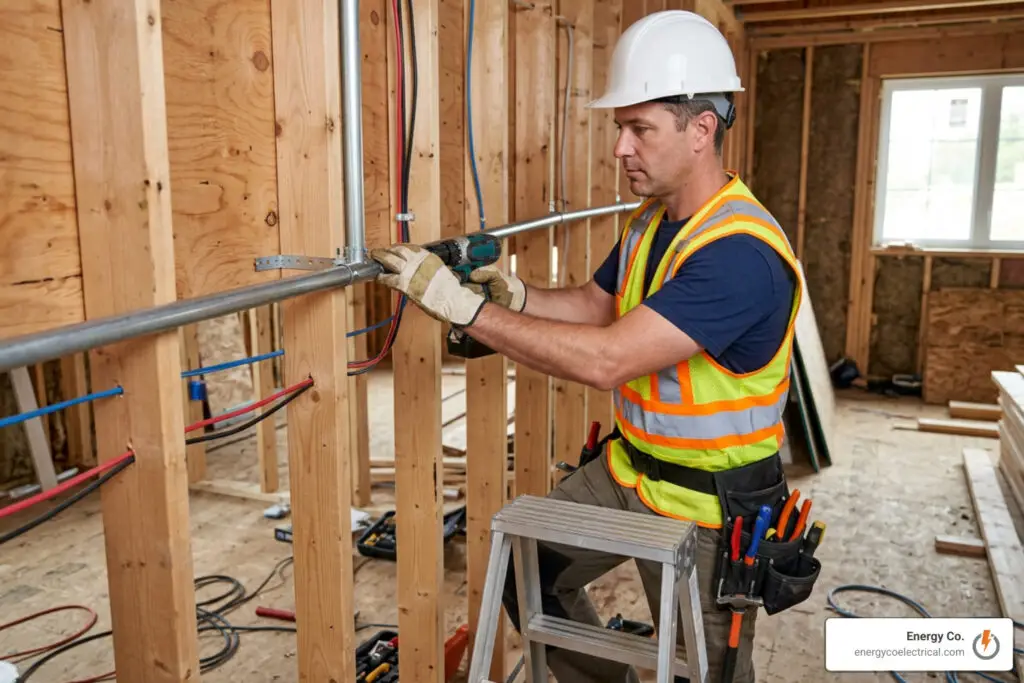
If you live in Chicago or certain surrounding suburbs in Cook County, you quickly learn that our electrical rules are unique. Unlike the vast majority of the United States, where plastic-sheathed Romex (NM-B) cable is pulled through wooden studs, Chicago municipal codes strictly mandate the use of metal conduit—specifically Electrical Metallic Tubing (EMT)—for almost all residential wiring installations.
This rigid standard dates back to the lessons learned from the Great Chicago Fire of 1871 and the city’s densely populated structural layouts. Thin-wall metal conduit provides several major advantages:
- Physical Protection: It is virtually impossible for a homeowner to accidentally drive a nail or screw through a steel conduit pipe and puncture a live wire.
- Fire Containment: If an electrical short or arc occurs inside the conduit, the metal pipe contains the spark and heat, preventing it from igniting wooden wall framing.
- Future Upgrades: Once conduit is installed, pulling new or larger wires through the existing pipe is incredibly simple compared to tearing open drywall to replace stapled cables.
Navigating these strict local ordinances requires specialized training. To learn more about how we approach these rigorous safety standards in our local area, read our guide on Sparking Joy the Ultimate Guide to Whole House Rewiring in Cook County.
Understanding Wire Gauges, Color Coding, and Cable Types
To successfully plan or troubleshoot a residential wiring installation, you must know how to select the right wire for the job. Using the wrong wire size or misidentifying a conductor is one of the most common causes of electrical failure.
| Wire Gauge (AWG) | Color of Outer Jacket (NM-B)* | Max Amperage | Common Household Uses |
|---|---|---|---|
| 14 AWG | White | 15 Amps | Standard lighting circuits, bedroom outlets |
| 12 AWG | Yellow | 20 Amps | Kitchen countertops, dining areas, bathroom outlets |
| 10 AWG | Orange | 30 Amps | Clothes dryers, water heaters, central A/C units |
| 8 AWG | Black | 40 Amps | Electric cooking ranges, large subpanels |
| 6 AWG | Black | 55 Amps | Heavy-duty appliances, EV charging stations |
*Note: Color-coded sheathing applies to NM-B cables used outside of conduit. Inside Chicago conduit systems, individual THHN/THWN conductors are pulled, relying strictly on internal wire color coding.
Matching Wire Gauge to Amperage for Safe Residential Wiring Installation
The American Wire Gauge (AWG) system is the standard for measuring wire thickness. In this system, the smaller the gauge number, the thicker the wire. Thicker wire has less electrical resistance, allowing it to safely carry higher currents (amperage) without overheating.
Matching the wire gauge to the circuit breaker’s rating is a non-negotiable safety rule. If you run a 20-amp circuit breaker but use 14 AWG wire (which is only rated for 15 amps), the wire can overheat and start a fire long before the breaker ever trips.
The NEC limits maximum breaker sizes for small copper conductors to prevent these exact scenarios:
- 14 AWG must be paired with a 15-amp breaker.
- 12 AWG must be paired with a 20-amp breaker.
- 10 AWG must be paired with a 30-amp breaker.
For a comprehensive breakdown of wire sizing rules under national standards, refer to the HOMEOWNER WIRING MANUAL.
Deciphering Cable Markings and Color Codes
Every wire inside your walls has a specific job, and the industry uses standardized color coding to make identification simple and safe.
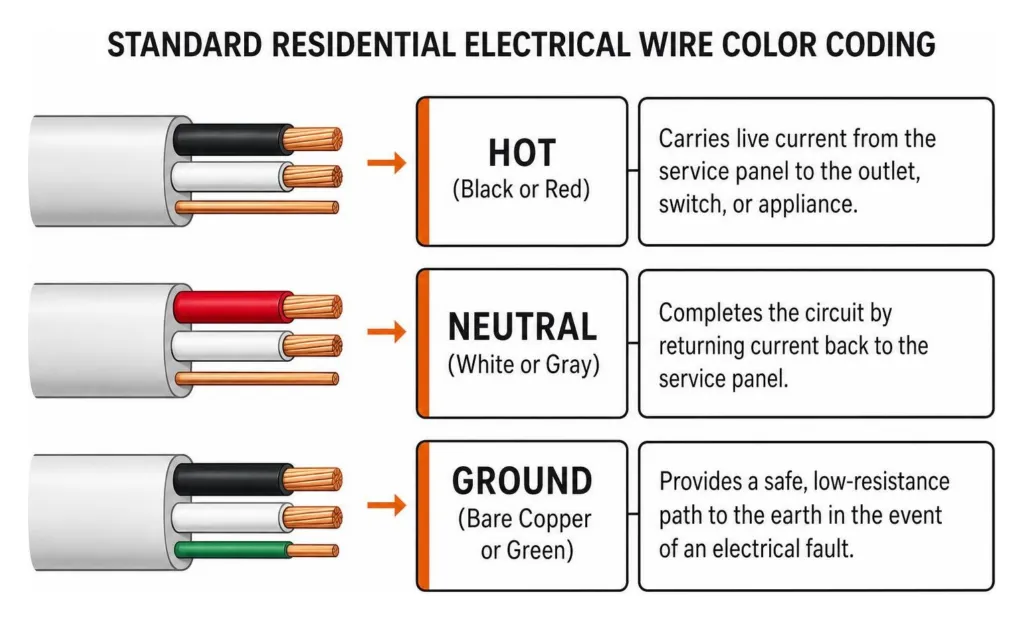
- Hot Wires (Black or Red): These wires carry live current from the service panel to the outlet, switch, or appliance. They should always be treated as energized and dangerous.
- Neutral Conductors (White or Gray): These wires complete the circuit by returning the used current back to the service panel. Even though they are neutral, they still carry current under load and must be handled with care.
- Grounding Wires (Bare Copper or Green): These wires provide a safe, low-resistance path to the earth in the event of an electrical fault. They do not carry current under normal operating conditions.
When working with cables, you will also see letter codes printed on the outer jackets. For example, NM-B (Non-Metallic) is standard indoor cable, while UF-B (Underground Feeder) is designed for outdoor use and direct burial in the ground because its conductors are fully embedded in solid, moisture-resistant vinyl.
To build a solid foundation in how these cables and wire systems function, you can read Mastering the Basics of Electrical Installation Work.
Step-by-Step Best Practices for Physical Installation
A successful wiring installation is built on clean, methodical execution. Whether you are running conduit or preparing junction boxes, taking shortcuts during the physical installation phase often leads to loose connections and future troubleshooting headaches.
Before beginning any physical work, we always map out the circuits on a detailed floor plan and verify that all power sources are completely de-energized using a reliable non-contact voltage tester. For a comprehensive look at how to plan your project from scratch, see A Comprehensive Guide to Rewiring Basics.
Stripping, Connecting, and Securing Wires
Proper wire preparation is a craft. When stripping the outer insulation from a wire, always use a dedicated wire stripping tool matched to the correct wire gauge. Avoid using utility knives or pliers, which can easily nick the inner copper core. A nicked wire creates a physical weak point and increases electrical resistance, which can lead to localized overheating under load.
When making connections inside a junction box, the industry best practice is pigtailing. Instead of running multiple incoming and outgoing wires directly to a single outlet or switch terminal, we join those wires together with a single short wire (the “pigtail”) using an approved wire connector (wire nut). This ensures that if a single outlet fails, the rest of the downstream circuit remains energized and unbroken.
Additionally, all cables must be physically supported and secured. For NM-B installations, this means using non-metallic cable staples within 12 inches of every electrical box and every 4.5 feet along wood framing. For Chicago conduit systems, steel straps must support the EMT run within 3 feet of every box and every 10 feet along the run.
For expert tips on perfecting your physical connection techniques, you can Download Wiring a House PDF by Rex Cauldwell, a highly regarded industry reference manual.
Calculating Box Fill Capacity to Prevent Overcrowding
One of the most frequently overlooked safety codes is box fill capacity. It is tempting to squeeze as many wires as possible into a single plastic or metal switch box, but overcrowding creates a massive fire hazard. When tightly packed wires rub against each other or are bent at extreme angles, their insulation can degrade, leading to short circuits.
The NEC uses a precise mathematical formula to determine how many conductors can safely reside in an electrical box based on its volume in cubic inches.
Each wire gauge is assigned a specific volume factor:
- 14 AWG requires 2.00 cubic inches per wire.
- 12 AWG requires 2.25 cubic inches per wire.
When calculating box fill, you must also account for the devices and hardware inside the box:
- All grounding wires combined count as a single volume allowance based on the largest ground wire in the box.
- Each strap containing a device (such as a receptacle or switch) counts as a double volume allowance based on the size of the wire connected to it.
- All internal cable clamps combined count as a single volume allowance.
For example, if you have an 18-cubic-inch junction box, you can safely hold up to nine #14 AWG wires if there are no devices or clamps installed. If you add a single outlet receptacle, that device takes up two wire allowances, reducing your maximum wire count to seven.
Common Mistakes to Avoid During Residential Wiring Installation
Even experienced DIYers can fall into bad habits that compromise the safety of their home’s electrical system. Recognizing these common errors is the first step toward preventing them.
If you are planning a major home renovation, understanding these potential pitfalls can save you thousands of dollars in corrective repairs. To see how these factors impact overall project budgets, read The Ultimate Guide to 1500 Sq Ft House Rewiring Costs.
Splicing Wires Outside of Junction Boxes
Under no circumstances should electrical wires be spliced together and wrapped in electrical tape inside a wall cavity or ceiling space. All wire splices must be housed inside an approved, accessible junction box.
Junction boxes serve a critical purpose: they physically protect connections from being pulled apart or damaged, and they are designed to safely contain any sparks, heat, or arcs that occur if a connection comes loose. If a splice is buried behind drywall, a failing connection can smolder and ignite wooden studs without your knowledge.
Overloading Circuits and Mismatched Breakers
Another dangerous mistake is trying to solve a tripping breaker by simply replacing it with a higher-capacity breaker.
If a 15-amp breaker on a 14 AWG circuit keeps tripping because you are running too many appliances, upgrading to a 20-amp breaker is a recipe for disaster. The 14 AWG wire is physically incapable of carrying 20 amps safely. The wire will act like a heating element inside your walls, melting its own insulation and potentially starting a catastrophic house fire before the oversized breaker ever senses a problem. Always solve circuit overload by running a new, dedicated circuit for high-draw appliances.
Frequently Asked Questions about Home Wiring
What is the difference between NM-B and UF-B cables?
NM-B (Non-Metallic) cable is designed strictly for indoor use in dry locations. It features a paper wrapping inside the plastic sheathing to keep the conductors dry, but it will easily absorb moisture and degrade if exposed to the elements.
UF-B (Underground Feeder) cable is specifically engineered for wet environments and direct burial. Its individual copper conductors are completely encased in solid vinyl, preventing water from traveling along the cable. UF-B is used to run power to outdoor light fixtures, detached garages, or pool pumps.
Why is pre-1972 aluminum wiring considered a fire hazard?
Between the mid-1960s and 1972, high copper prices led many builders to use aluminum wiring for residential branch circuits. It was later discovered that aluminum has unique physical properties that make it highly unstable at connection points.
Aluminum expands and contracts significantly more than copper when carrying electrical current (a phenomenon known as “creep”), which slowly loosens screw terminals over time. It also oxidizes rapidly, and aluminum oxide acts as an electrical insulator, creating high resistance and dangerous heat at outlets and switches. In fact, homes wired with pre-1972 aluminum wire are 55 times more likely to have connections reach fire hazard conditions than those wired with copper.
Unsafe aluminum wiring can be permanently repaired using specialized copper pigtailing with COPALUM connectors, or by completely rewiring the home with modern copper conductors.
How do I determine the correct box size for my wiring project?
To find the right box size, write down everything that will go inside the box: the number of hot and neutral wires, the grounding wires, any internal clamps, and the switches or outlets.
Multiply each item by its corresponding NEC volume factor (2.00 cubic inches for 14 AWG, or 2.25 cubic inches for 12 AWG). Add these numbers together to get your minimum required box volume, and select a plastic or metal box that meets or exceeds this capacity. When in doubt, always choose a larger box; having extra space makes physical installation easier and keeps your wires cooler.
Conclusion
A safe, reliable electrical system is the most important utility in your home. From powering your daily smart devices to keeping your family safe from invisible hazards, a professional residential wiring installation is an investment in your property’s long-term value and safety.
While understanding the basics of wire gauges, color codes, and box capacities empowers you to spot warning signs in your home, high-voltage electrical work is inherently dangerous. One loose wire or mismatched breaker can put your family and your home at serious risk.
At Energy Co., we have spent decades helping homeowners across Schaumburg, Hoffman Estates, Elk Grove Village, and the entire Chicagoland area upgrade, repair, and maintain their electrical systems. Our team of fully licensed, insured, and experienced electricians specializes in navigating Chicago’s unique metal conduit requirements and the complex infrastructure challenges of our historic local homes.
Whether you need to upgrade an outdated service panel, install a dedicated EV charging station, or completely rewire your home, we back all of our work with an uncompromising satisfaction guarantee. Contact us today to schedule your professional Residential Electrical Services and experience the peace of mind that comes with reliable, code-compliant power.