Electrical Panel Maintenance Helps Prevent Dangerous Overloads
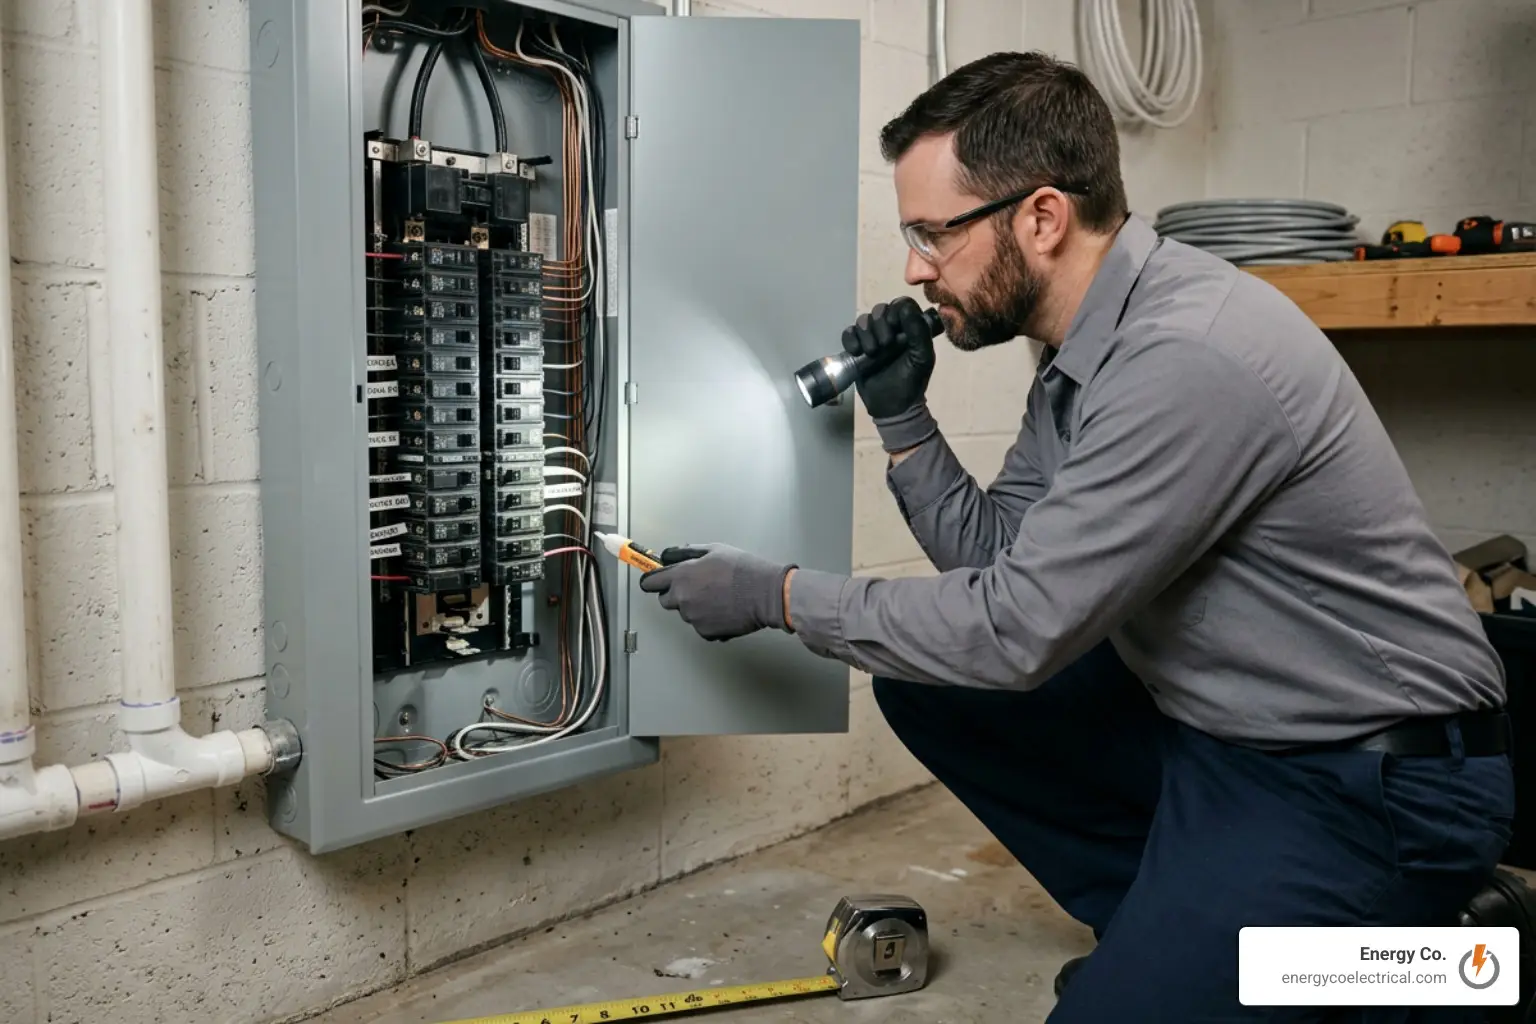
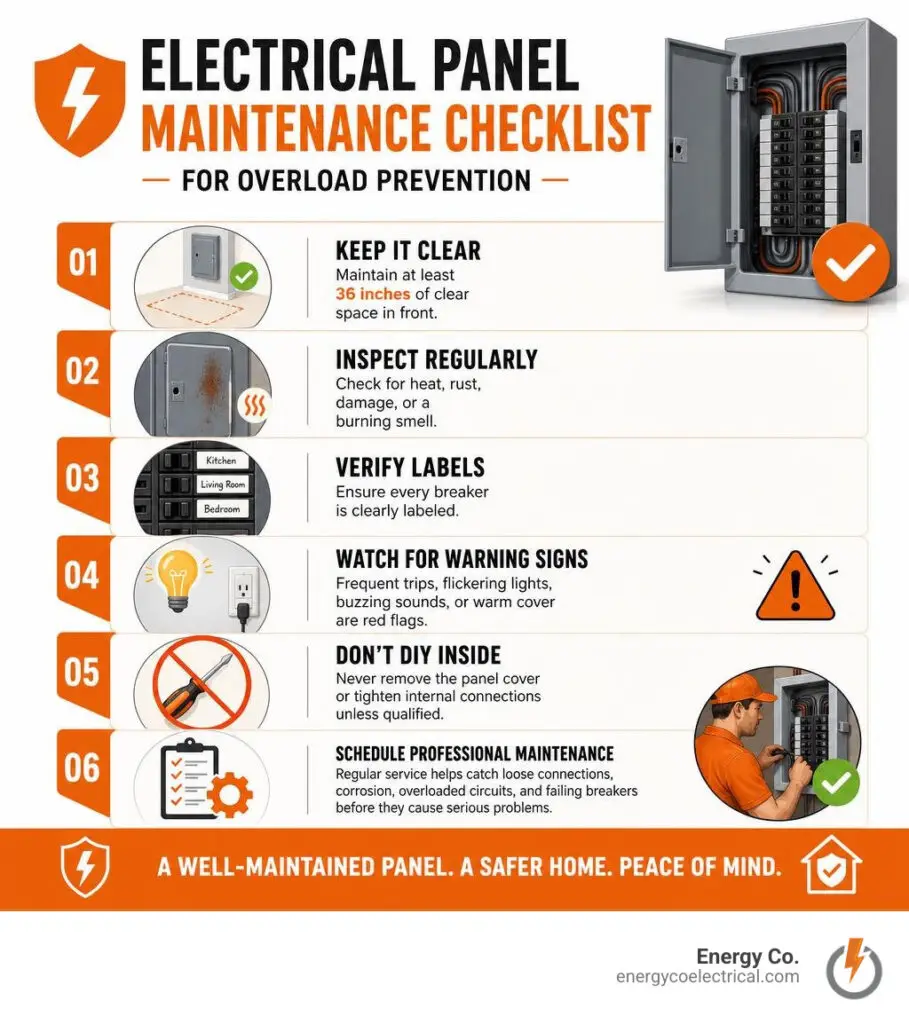
Safe electrical panel maintenance starts with simple habits: keep at least 36 inches of clear space in front of the panel, check the exterior regularly for heat, rust, damage, or a burning smell, and make sure every breaker is clearly labeled. If breakers trip often, lights flicker, the panel buzzes, or the cover feels unusually warm, stop treating it as a nuisance and call a licensed electrician.
A clean, accessible panel helps you shut off power fast in an emergency. Regular professional service also finds loose connections, corrosion, overloaded circuits, and failing breakers before they cause power loss, equipment damage, or a fire risk. Never remove the panel cover or tighten internal connections yourself unless you are qualified to work on electrical equipment.
I am Michał Napieralski of Energy Co., and our licensed team performs electrical panel maintenance, panel upgrades, breaker replacement, and electrical inspections across the Chicago suburbs. Next, learn what is inside your panel and which safety rules matter before any maintenance begins.
Electrical panel maintenance vocab to learn:
Understanding Electrical Panel Components and Safety Regulations
Your breaker box acts as the central hub for every watt of power entering your property. Taking the time to start demystifying your home electric panel without getting shocked allows you to understand how electricity routes safely into your living spaces.
Modern residential and commercial electrical systems rely on standards established by the National Electrical Code (NEC) and the National Fire Protection Association (NFPA), particularly standard NFPA 70B for electrical equipment maintenance. Adhering to manufacturer specifications outlined in UL LV Panelboard documentation ensures panelboards remain resilient against power fluctuations, moisture ingress, and dangerous component degradation.
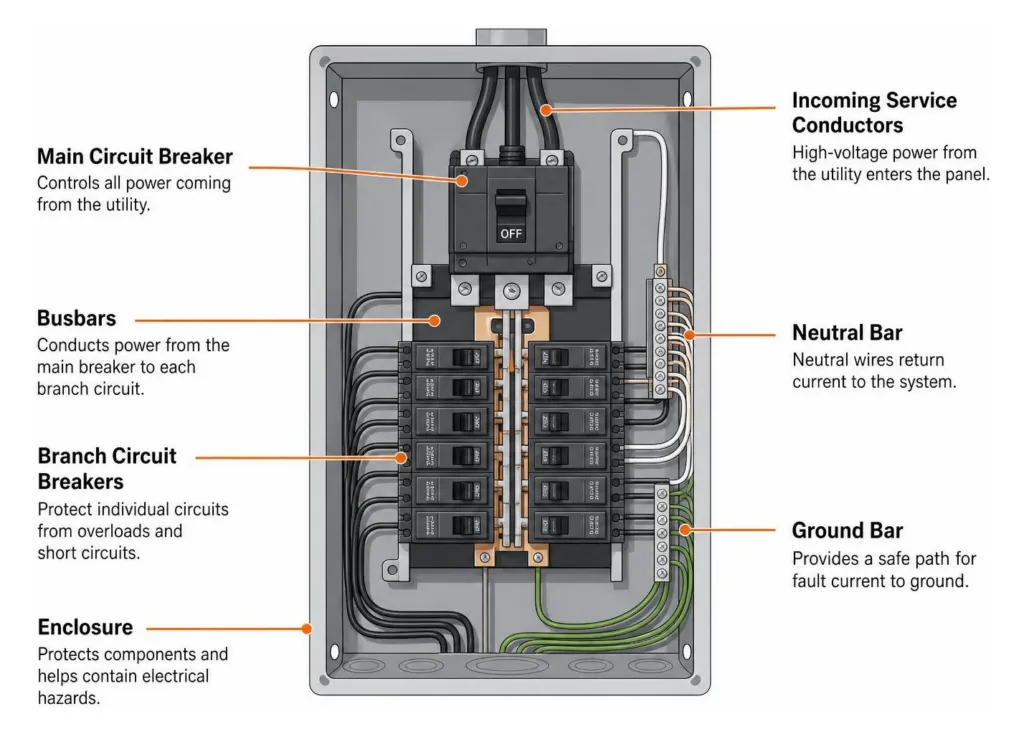
Main Breakers, Branch Circuits, and Busbars
Inside the enclosure, several critical elements work in unison to distribute electricity while guarding against overcurrent events:
- Main Circuit Breaker: This high-amperage switch controls the total electrical load coming from the utility meter into the entire enclosure. Switching this off cuts power to all branch circuits, which is vital during service or emergency events.
- Hot Busbars: Heavy-duty metal conductor bars carry electrical current down both sides of the panel. Circuit breakers clip directly onto these busbars to pull electrical power.
- Branch Circuit Breakers: These individual switches route power to dedicated zones throughout the property, such as kitchens, bedrooms, and heavy appliances. They utilize thermal-magnetic mechanisms designed to trip automatically when current exceeds safe operating thresholds.
- Neutral and Ground Busbars: The neutral bar provides a return pathway for normal electrical current, while the grounding bar safely redirects stray electrical faults into the earth, preventing metal enclosures and appliance housings from becoming energized.
Gaining a foundational understanding from a beginner breakdown of home electrical wiring and safety highlights why balanced busbar loads and intact neutral bonding are critical to preventing nuisance trips and severe electrical shock hazards.
Regulatory Clearances and Code Compliance
Code compliance is an indispensable safety barrier. Under NEC Section 110.26 and OSHA guidelines, electrical equipment requires a dedicated working space:
- Clear Depth: A minimum of 36 inches (3 feet) of unobstructed space directly in front of the panel door.
- Clear Width: A minimum width of 30 inches or the width of the panel enclosure, whichever is wider.
- Headroom: Clear workspace extending from the floor to a minimum height of 6.5 feet or the height of the equipment.
Adhering to Maintaining Electrical standards helps property owners meet NFPA 70E safe work requirements and satisfy the OSHA General Duty Clause. Storing boxes, paint cans, cleaning chemicals, or shelving within these zones creates severe safety risks, hampers heat dissipation, and prevents instant access during emergencies.
Step-by-Step Electrical Panel Maintenance Checklist
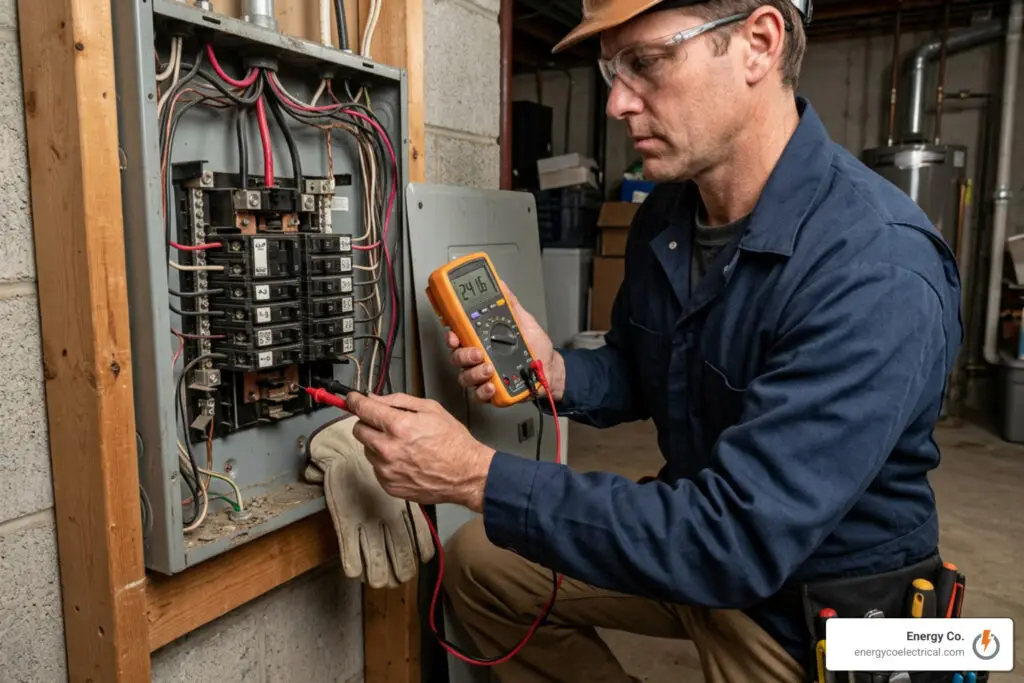
A comprehensive preventive maintenance program reduces component failure rates significantly and prevents costly unplanned power outages. Following a structured procedure aligned with the Standard for an Electrical Prevention Maintenance (EPM) Program ensures every point of vulnerability is systematically tested, cleaned, and verified.
Essential Tools and PPE for Electrical Panel Maintenance
Working around electrical panels requires strict safety measures and specialized tools:
- Personal Protective Equipment (PPE): Arc-rated face shields, safety glasses with side shields, NFPA 70E-compliant flame-resistant (FR) clothing, voltage-rated rubber insulating gloves with leather protectors, and dielectric safety boots.
- Insulated Hand Tools: Screwdrivers, hex keys, and pliers rated to 1,000 volts (IEC 60900 compliant) to protect against accidental contact with energized terminals.
- Diagnostic Instruments: True-RMS digital multimeters, calibrated torque wrenches, infrared thermal cameras, and insulation resistance testers (megohmmeters).
- Specialized Cleaning Gear: Non-conductive dry lint-free wipes, soft-bristle non-static brushes, and industrial HEPA-filtered vacuums with non-metallic nozzles.
Inspection, Cleaning, and Connection Torque Verification
During a professional maintenance routine, our technicians follow a precise sequence:
- Lock-Out/Tag-Out (LOTO) and De-Energization: Power is disconnected upstream at the main disconnect or meter whenever internal structural work is conducted. A multimeter verifies zero voltage across all phase conductors before any physical contact occurs.
- Physical Enclosure Inspection: The cabinet is inspected for signs of rust, water infiltration, missing knockouts, physical dents, or pest intrusion.
- Internal Cleaning: Dust and particulate buildup are removed using brush-assisted HEPA vacuuming. Compressed air is never used, as it can blast conductive dust particles directly into sensitive breaker mechanisms.
- Torque Verification: Every mechanical lug, breaker clamp screw, neutral connection, and ground bond is tested with a calibrated torque wrench to the exact inch-pound specifications printed on the panel door label. Thermal expansion and contraction cycles naturally loosen screws over time, introducing high electrical resistance.
- Peripheral Device Inspection: Testing connected circuits and performing outlet switch troubleshooting ensures that ground-fault circuit interrupters (GFCIs) and arc-fault circuit interrupters (AFCIs) respond correctly across all branches.
Thermal Imaging and Insulation Resistance Testing
Non-invasive diagnostic instruments allow electricians to see problems hidden beneath wire insulation:
- Infrared Thermography: While the panel operates under normal load, technicians scan the main breaker, individual circuit breakers, and busbar connections. Under NFPA 70B standards, temperature differentials ($Delta T$) between similar components indicate problems:
- $Delta T$ of $1^circtext{C}$ to $10^circtext{C}$: Possible deficiency; monitor at next cycle.
- $Delta T$ of $11^circtext{C}$ to $40^circtext{C}$: Probable deficiency; repair at next scheduled maintenance window.
- $Delta T > 40^circtext{C}$: Critical deficiency; requires immediate de-energization and corrective action.
- Insulation Resistance Testing: A megohmmeter injects high DC voltage (typically 500V or 1,000V) to evaluate conductor dielectric strength between phase lines and ground. Readings must exceed standard thresholds—typically well above 50 to 100 megohms ($MOmega$) under dry conditions. Low readings signal moisture contamination or degraded insulation that demands prompt circuit breaker repair or wire replacement.
Recognizing Warning Signs of Panel Overload and Degradation
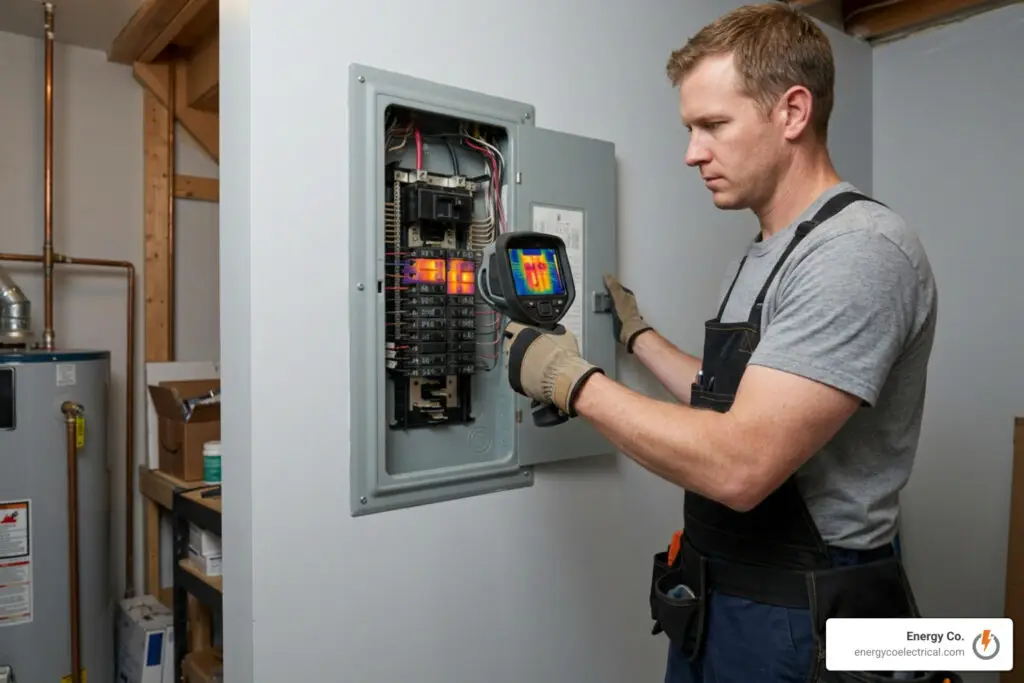
Catching minor electrical issues early protects expensive electronics, prevents severe brownouts, and eliminates fire risks.
If lights dim whenever the air conditioning or microwave starts up, explore why is my house flickering diagnosing home electrical problems and how to fix them to pinpoint whether circuit imbalances or high-resistance utility connections are to blame. Understanding proper steps for stop the trip a guide to arc fault breaker repair and costs will also help you identify true fault conditions versus simple appliance incompatibilities.
Visual and Auditory Failure Indicators
Never ignore sensory warning signals coming from your electrical enclosure:
- Hissing, Buzzing, or Crackling Sounds: A healthy electrical panel operates in silence. Continuous buzzing or arcing sounds indicate loose connection lugs, vibrating breaker components, or active micro-arcing.
- Discoloration and Melting: Charred terminal insulation, soot marks on the dead-front metal cover, or heat-bubbled paint on the enclosure wall signal dangerously high localized temperatures.
- Odor of Burning Plastic or Fishy Smells: Electrical insulation breaks down at high temperatures, releasing distinct, pungent odors. If you detect this near the breaker enclosure, cut power immediately.
- Breakers Hot to the Touch: While breakers under steady load may feel warm, a breaker that is hot to the touch indicates internal mechanical wear or severe branch overloading.
Signs of Aging Equipment and Capacity Limits
Modern homes with EV chargers, induction ranges, and heat pumps place heavy demands on infrastructure built decades ago. Panels that have surpassed their design lifespan or lack current capacity need evaluation:
- Equipment Over 25 Years Old: Panels installed more than 25 years ago often suffer from worn spring clips, degraded busbar plating, and obsolete safety features.
- Legacy and Problematic Panels: Outdated fuse boxes or legacy panels known for high breaker failure rates (such as Federal Pacific Electric Stab-Lok or Zinsco panels) must be swapped out to ensure reliable overload and short-circuit protection.
- Lack of Physical Expansion Space: When every slot is filled and tandems are maxed out, homeowners should plan an electrical panel upgrade to accommodate modern appliance loads. Reviewing the homeowner guide to buying a 200 amp electrical panel helps you choose the right capacity for modern heating, cooling, and charging demands.
Routine vs. Preventive vs. Extraordinary Maintenance
Comprehensive system reliability requires matching the right maintenance action to current operating conditions. The Electrical Panel & Power Distribution Maintenance Checklist (Inspection, Safety & Compliance Guide) distinguishes maintenance activities across three distinct tiers:
| Maintenance Tier | Typical Frequency | Core Scope of Work | Primary Purpose | Performed By |
|---|---|---|---|---|
| Routine | Monthly to Quarterly | Visual inspection, clearance checks, exterior cleaning, trip-reset testing | Identify early external damage and maintain code-mandated clearances | Homeowner or Facilities Tech |
| Preventive | Annually to Every 3 Years | Infrared scanning, torque checks, internal vacuuming, megohmmeter testing | Prevent thermal runaway, detect moisture, and extend equipment life | Licensed Electrician |
| Extraordinary | As-Needed (Post-Fault) | Component replacement, busbar refurbishing, arc-damage repair, panel swaps | Restore safe power following major electrical faults or component failure | Licensed Electrician |
Establishing a Routine Electrical Panel Maintenance Schedule
A well-structured maintenance timeline prevents surprise failures:
- Monthly: Inspect the physical perimeter around the panel to ensure the 36-inch clearance remains unobstructed. Verify the panel door closes securely.
- Semi-Annually: Test all GFCI and AFCI breakers by pressing their built-in “Test” buttons to confirm the internal trip mechanism operates freely.
- Annually: Schedule an infrared diagnostic scan and visual inspection. Homeowners in Schaumburg, Hoffman Estates, and Arlington Heights can consult the ultimate 2026 guide to spring electrical maintenance and upgrades for schaumburg homeowners to time seasonal panel assessments ahead of peak summer cooling loads.
- Every 3 to 5 Years: Complete a comprehensive internal service, including torque verification of all lugs, megohmmeter insulation resistance testing, and ground-rod impedance measurements.
DIY Maintenance Boundaries vs. Licensed Electrician Intervention
Homeowners can safely handle simple external tasks, such as checking labels, keeping storage out of the 36-inch clearance zone, and resetting an occasional tripped branch breaker.
However, removing the dead-front cover exposes live busbars and main service entrance cables that remain fully energized even when the main switch is off. If you notice persistent breaker trips, buzzing, or scorched components, use our practical guidance on finding a reliable electrician near me what you need to know to bring in a qualified expert. When dealing with sudden failures or active hazards, our 24 hour emergency electrical repair guide for homeowners provides immediate safety steps to secure your home.
Frequently Asked Questions about Electrical Panel Maintenance
How often should an electrical panel be inspected and serviced?
A visual check should be done every few months to keep the area clear and clean. Comprehensive professional inspections should occur every 3 to 5 years for standard residential systems. Properties older than 25 years, commercial facilities, or homes with high power draw should schedule annual infrared thermography and diagnostic evaluations through dedicated residential electrical services.
Can I clean dust and debris out of my electrical panel myself?
You can safely wipe down the closed exterior door and surrounding wall surfaces with a dry cloth. You should never remove the metal dead-front cover or insert vacuum attachments, brushes, or liquids inside the panel. Uninsulated main service lugs carry lethal current straight from the grid. Internal cleaning must be handled exclusively by licensed electricians using insulated tools, non-conductive vacuums, and appropriate arc-rated PPE.
What is the average lifespan of a residential electrical panel?
Standard residential breaker panels last between 25 and 40 years under optimal environmental conditions. However, high humidity, basement moisture, heavy continuous electrical loads, and loose mechanical connections accelerate degradation. If your system is approaching three decades of service or exhibits signs of heat distress, review how much to swap the box your guide to electrical panel upgrade costs to budget for a modern, reliable replacement.
Conclusion
Your electrical panel protects your home from overloads, short circuits, and electrical fires. Sticking to a consistent maintenance routine, maintaining code clearances, and scheduling professional diagnostic inspections keeps your electrical infrastructure running smoothly and safely for years to come.
Energy Co. provides expert maintenance, safety evaluations, panel upgrades, and 24/7 emergency response throughout Chicago and the surrounding suburbs, including Schaumburg, Hoffman Estates, Elk Grove Village, Rolling Meadows, Palatine, Roselle, Streamwood, Hanover Park, Arlington Heights, Mount Prospect, and Cicero.
Schedule an appointment for professional electrical services and comprehensive panel evaluations with our certified team today to ensure your home stays fully protected against dangerous overloads.